Pages

Thursday, April 27, 2017

Crossings

Having barely just finished my latest Faith Circle quilt for do,Good Stitches I feel like I'm jumping right into the next! Using the Kona Crossing pattern by Jacey/JaceyCraft on the Robert Kaufman site, I'm asking for something a little different this next month - just one 15 1/2" block from each bee-mate. I've already made 3 blocks in each of three background colors - Kona Midnight, Aqua, and Ochre. It's quite a unique palette for me, especially with the add-ins of Pink Flamingo and other shades of the dark blue and aqua, and even a few scraps of teal-green.


Jacey's pattern is of course, for an entire quilt, and in making just one block, here's what you'll need to cut:

  • 9 - 5 1/2" squares background fabric - Please make these all the same and in one of the colors I used - dark blue, aqua, or gold. If you have a Kona color card, check that your background color coordinates well with the colors of my blocks.
  • 9 pairs 1 1/2" x 6" strips - Each pair will be used to make one cross block. I actually didn't cut 6" lengths, but had longer strips I trimmed as needed during construction. Do what works best for you. 

Your block can have nine different colored crosses, though some duplication in color would be fine, like I have done. Please use at least 3-4 colors for your crosses though, in shades of dark blue, aqua, and gold. Feel free to add in Pink Flamingo or any peachy-pink, as well as teal-green, but don't feel like you have to. I've used all solids, and that would be my preference, but if you don't have what will work, feel free to use tone on tones. A little white or neutral in a print would be fine, but please have any prints read as a single color. 


Refer to Jacey's pattern for block construction. I think you'll find this a fun, quick block. I've posted in our Flickr group where you can check in, ask any questions, and post a photo of your block. Thanks for helping me make another quilt for good!

Tuesday, April 25, 2017

Tuesday at the Table


When it came to our attention last weekend that one of Food&Wine's best new chefs for 2017, Jay Blackinton and his Hogstones Wood Oven, was just nine short miles from our island retreat, it didn't take long for us to inquire, and lucky us, we nabbed a reservation.


With seats for less than 30, just sitting there in the dining room felt noteworthy, and nothing else that happened the entire evening made us feel that any less. To start, was the subject of the wine list. As hubby perused it, he encountered a category that was unfamiliar: Orange. Orange? A brief conversation with our waitress, and we were enlightened. "They are white wines made by leaving the grape skins and seeds in contact with the juice, creating a deep orange-hued wine." [Wine Folly] Hogstone was pouring Dinavolino from Italy, and though it wasn't to my taste, hubby really enjoyed it, and we'd learned something!


Food-wise, first came pizza from the afore-mentioned wood oven - topped with smoked tomato, dried herbs, and fresh cow cheese. Uncomplicated, rustic, and tasty.


From there, things just kept getting more interesting as we tried a couple of small plates.... 'Rhubarb & Arugula, Grilled Sirloin of Henri the Pig'....


and 'Grilled & Preserved Leeks, Halibut and a Sauce of Its Bones'....


And with just two desserts on the menu, we obviously had to try them both.... Raw Milk Sorbet with Conifer 'leaves' and Rhubarb Sauce....


and Woodruff and Cream with Dandelion Root in what was very much like a caramel tartlet. (yum!)


According to Food&Wine"If it doesn’t thrive on Orcas, Jay doesn’t cook it, a choice that makes for the purest expression of Pacific Northwest cuisine we’ve ever encountered." We thoroughly enjoyed our delicious evening experiencing the Chef's unique and exquisite tastes, and it was a perfect ending to our week away. Now back to reality in more ways than one!

Monday, April 24, 2017

Baby Goods

My Bee Sewcial mates and I threw a virtual baby shower for one of our own recently, and I can now share what I made for Kari/quiltsforthemaking and her new little boy.


One of the items I've enjoyed making several times for baby gifts is a travel changing pad from Amy Butler's Little Stitches for Little Ones. I used this pattern to make a couple for grandgirl when she was a baby, and they worked and washed really well. I didn't think to get a photo that better shows that the inside is made from terry cloth, but it's soft and cozy. Having participated in the heƄrtland Blog Tour along with Kari, I knew she liked the line and had made a quilt for baby with it. Kismet!


Another go-to baby pattern is Little Baby Bibs by Jennie/Clover & Violet. These were especially fun with the fussy cut animals from the Hello, Bear collection by Bonnie Christine.


Sweet little baby items are always a fun sew. I keep adding to a Sewing for Baby pin board, so I'm prepared with ideas when the need strikes!

Thursday, April 20, 2017

All the Greens


What little guilt I had for not finishing February's Faith Circle quilt in the suggested timeline melted away today. Hubby and I are on a week-long get-away on Orcas Island, and this afternoon's exploring included a visit to Orcas Island Pottery, the oldest pottery in the Pacific Northwest, and a landmark since its inception in 1945. And yes, the pottery was lovely, showcased throughout the garden and in historic log cabins. The setting was itself, somewhat magical.


But it was the treehouse that led me to ask permission to take some photos, and photoshoot aside, climbing up into the 200 year old cedar tree took me back to my childhood, where encountering such a treehouse (with a bunkbed! and a play kitchen!) would have been a dream come true.


Back to the quilt, yes? It was inspired by the Pantone Color of the Year Greenery, and in fact, became a collection of many wonderful greens. Our bee used Jodi/Tales of Cloth's Squash Blossom block tutorial, which is just so striking. 


For the backing, I actually chose a print from Violet Craft's Christmas at Brambleberry Ridge, but it was a perfect green to tie those on the front together - enough so that I used it for the binding as well.


Quilting was kept simple - a serpentine stitch vertically across the quilt in Aurifil 50wt #2024 (White).


The finished quilt measures 48" x 60". I began to sew the binding on just a few days ago, waiting in the ferry line to Orcas, and took the last stitch in a cabin overlooking Deer Harbor. To be able to take photos of it with such an enticing backdrop as the pottery grounds was a bit of a thrill. Kind of like coming to the end of a well-loved fairy tale.


This project was on my 2017 Q2 Finish-A-Long list!

Monday, April 17, 2017

Minimal Day :: Bias Curves

It's the most amazing thing. But so many in the Seattle MQG are completely smitten with this year's block-of-the-month, figuratively sitting on the edge of their seats waiting for the next block assignment to be revealed. And I'm right with them.


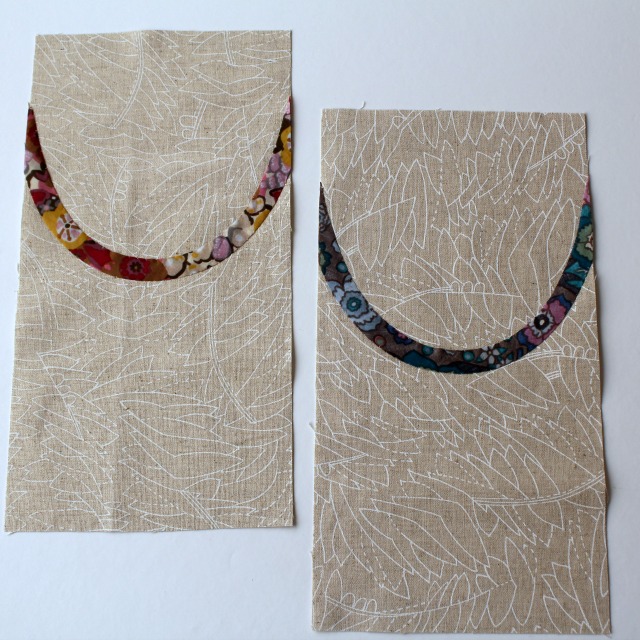
The latest blocks have bias curves, and despite the necessary use of a template for placement, all went very smooth. I happened to already have the suggested 1/2" bias tape maker, so that made easy work of making the tape. And even though I prepped the block elements fully planning on stitching them up on an upcoming road trip, I found them so tempting, I stitched them right up. Here are all my blocks so far. Obviously, I'm anxious to see what's next!!

Tuesday, April 11, 2017

Refiner's Fire

The project I'm sharing today is unique in a few ways. To start, the Instagram photo of the blocks on my design wall is my MOST liked photo of all time... like beyond double. Go figure. Also is the fact that it was made for a challenge with very specific guidelines. It's a black and white plus one challenge, though any mix of prints and solids was fine. But the finished size had to be 40" square. So those guidelines were more than I usually work with.


To add to all that, this piece was created for the Women of the ELCA (which I am) Tenth Triennial Gathering in July. The theme for the challenge is simply "all anew". That prompted me to think of a new day and a rising sun, though as I created this piece on my design wall, along the way it became more of a refiner's fire. And that's what I see in the finish.


To begin, I gathered all sorts of black and white prints and solids from my stash, and as I went, added in the gold as my "plus one." Using the stitch-and-flip method was very random, and I'd make several 3 1/2" blocks, find a home for them in the quilt layout, and go back and make more. It was all very fluid and in the moment, as well as an exercise in value as I moved from the black to the gold to the white.

For quilting, I chose to again use my three colors - Aurifi 50 wt #2692 (Black), #2140 (Mustard), and #2024 (White). I began with upward angled spikes in the center section with the Mustard, filled in below using Black, then added downward angled spikes in the upper section in White thread. Though I marked the very first row of spikes with my hera marker, all the rest were improvisational but approximately 1/2" apart. This design was really enjoyable for me to quilt and I'm sorry it didn't photograph better for you.


One little complication with my design and not knowing how much shrinkage would occur with quilting resulted in my piece being slightly smaller than the requisite 40" square. I solved this issue by trimming the quilted piece to exactly 40", which just happened to be barely outside of the edge of the fabric. Ie. about 1/8" to 1/4" of batting showed around the perimeter. Thus binding needed to be both cut wider and sewn more than 1/4" from the edge. But it all worked out! And finishing at 3/4" wide, I think the wider binding frames the piece nicely.


So I'll be sending this quilt off to Minneapolis soon and I hope to eventually see photos of it in the show as well as other quilts representing the theme. I can't say I've used my craft to create something faith-based before, or actually based on much other than my creative whim. So that was an added aspect to this project and good food for thought along the way. According to Merriam-Webster, one of the definitions for "refine" is:  to make improvement by introducing subtleties or distinctions. I hope that in adding another dimension of myself, I did that here.


This project was on my 2017 Q2 Finish-A-Long list!
Linking up with Finish It Up Friday!

Monday, April 10, 2017

Miniature Florals

Creating alongside the Bee Sewcial gals is always inspiring, and I'll admit to almost always being a tad intimated by the prompts they come up with. This month with Marci/
@marci_girl was no different, with her request for Miniature Florals. As the blocks started appearing on Instagram, I was in awe. I think I say that every month. But goodness, what absolutely darling little (6 1/2" square) blocks. And the request for bright solids on black (or very dark blue) backgrounds was inspired.


  • The upper-right block is what came to mind when I first saw Marci's prompt, and it's my favorite of my four blocks, even though hubby and others on Instagram thought it looked like a jellyfish. Whatever. Just a wee bit of thread-stitching was a fun addition.
  • The bottom-right block was inspired by the Fractured Curves block tutorial by Carole Lyles Shaw/@carole_lyleshaw, and though I stopped before the end of her tutorial, I'd really like to try the method again. And yes, the 'center' is a little embroidered lazy daisy chain. Since Marci ok'd some embroidery, I figured why not. 
  • The bottom-left block started out as a tulip from a drawing by grandgirl, but morphed into a crocus; and finally,
  • the upper-left block was created from truly leftover snippets, and indeed, the idea for the leaves came from Rachel/@snippetsofsweetness herself. Again, a little minimalist thread-stitching finished it off.
So there's my little foursome, and even though I'm not really a floral-type person, I'm kind of in love with them. 

Friday, April 7, 2017

Waves.Depth.Flow

Felicity/@felicityquilts provided the "waves.depth.flow" prompt for Bee Sewcial last month along with the delicious palette of teal, green, and copper inspired by a Starbucks bag. Yeah, I liked that right off! But I got down to the wire in making my block, and the perfect lighting for a photo didn't present itself, so the colors here are off. sigh


Anyway, I went with very geometric 'waves' with some mild 'flow.' creating one block, 18" x 18 1/2". As always, I'm anxious to see these blocks all together. There have been a couple of new Bee Sewcial finishes recently - see them all here!

Thursday, April 6, 2017

Playing By the Rules

This post in no way is intended to point fingers or say something is right or wrong. Not in the least. It's just a reflection back in time - my time - to when I first started quilting. If you follow with any regularity, you'll already know much has changed for me along the way. And depending on how long you've been quilting, I bet much has changed for you as well. But in sharing recently about one of my first quilts Back in the Day, it made me recall many of 'the rules' I lived by. Basically, the techniques and guidelines I learned in my beginning quilting class in 1987 remained exactly what I did for many years following:
  • Choose a large floral, then pick fabrics with those colors, but varying values, to round out the fabric pull. Include large, medium, and small scale prints to provide balance to the quilt.
  • Hand-piecing, which lasted for just two quilts, a 9-patch sampler, and the quilt you'll see below. But by then it was second nature.
  • Press seams to the side and to the dark side. Always.
  • Quilt blocks were separated by sashing, and every quilt top was finished off with a border.
  • A solid backing was the name of the game, and for some reason, I always chose muslin - maybe so that the quilting showed up well?
  • Basting was done by hand with a long needle and a long running stitch.
  • I only hand-quilted for a very long time.... over 20 years. I finally sent a quilt to be long-armed in 2003 and did that occasionally until I eventually started machine quilting most of my own quilts in 2010.
  • Bias binding, cut at 2" wide, finished by hand. 
  • A hand-written label. Of course.
Case in point is the quilt below - my second quilt, finished in 1990. My long-time friend Sharon/@redapplestitches went along to our local quilt shop and helped me choose the fabrics. The rust-colored focal isn't that large of a print, but otherwise, this quilt fits all the 'rules' listed above. "Shirley's Sampler" measures 74" x 88" and is completely hand-pieced and hand-quilted. It took me a year to piece, a year to quilt, and the finished quilt hung beneath the vaulted ceiling in our living room for ages.


Things have really changed, haven't they?! {grin} And those rules? Eventually I felt confident enough to break each one. Oh good, right? I remember them with fondness, while thankful that in my quilting endeavors today,  the rules are few and far between.

So what rules do you create by? Any you have given up on? How about ones you are itching to break? Do tell.

Tuesday, April 4, 2017

2017 Finish-A-Long :: Q2 List

Though I'm got some new projects on my mind, there are two that are in progress and will be first up for Q2 of the Finish-A-Long:

This stitch and flip quilt has been set aside for a while, and I'm really anxious to get back to it - especially the quilting. I've actually got half of the rows pieced, so it shouldn't take too long to make good progress on it.


I also have February' Faith Circle quilt to do. Inspired by Pantone Color of the Year Greenery, we used Jodi/Tales of Cloth's Squash Blossom block tutorial. I decided on layout and have the blocks arranged next to my machine to begin piecing the rows.


So just two wips for Q2, and hopes are high!

Lining up with 2017 Finish-A-Long Q2!

Monday, April 3, 2017

2017 Finish-A-Long :: Q1 Finishes

Goodness! I only had two projects on my Q1 Finish-A-Long list and am feeling quite the relief at having gotten them both finished!

First up was my Seattle MQG improv BOM which I was still in the process of designing at the start of the quarter. 


I ended up adding more skinny improv spikes along the left side, bringing it up to a size I was happy with (68" x 82"). Asking my guild-mate Matt Macomber/@odditease quilt it was a stroke of genius on my part, and he really brought the quilt to life. I call it Improv Alliance and still can't stop staring at it!


The Patchwork Forest quilt, using the Modern Christmas Tree block tutorial by Amy/Diary of a Quilter, very nearly did not get completed in time!


Making up the 100 blocks I needed wasn't the problem, but keeping on top of the process was. But whew! I took the last stitch in the binding on the final link-up day, and that made me a happy camper. Timing and weather didn't allow for an all-out photoshoot for my Uncommon Forest, but honestly, I'm just glad to have her done!


So now it's time to start a fresh new quarter and see what's up next!

Saturday, April 1, 2017

Uncommon Forest

Throughout last year's Christmas rush, I saw oodles of folks making a Patchwork Forest quilt, and I admired them all. That led to me impulsively starting one of my own, knowing full well I'd be making it for this year. And why not, right?


The unofficial Christmas colors around here focus on green, and in making our tree skirt and lap quilt in year's past, I've added in aqua/teal, gray, and even brown. So of course that's what I did again, which makes it very foresty, in my humble opinion. I pulled quite a variety of fat-eighths and partial fat-quarters from my stash for the blocks, so along the way, this became an effective stash-buster.


I used the Modern Christmas Tree block tutorial by Amy/Diary of a Quilter, which is a larger version of her original Patchwork Forest Quilt tutorial. The trees are cut improvisationally, then trimmed up. For some reason, mine came out slightly smaller than Amy's (7" x 9") - creator error I'm sure - measuring 6 1/2" x 8" finished. Arranged 10 blocks by 10 blocks, the quilt finished at 65" x 80".


For quilting, I chose organic straight-line quilting horizontally across the quilt, hoping it would give a hint of strings of tree lights. I used Aurifil 50wt #4060 (Silver Moon), which is variegated, and #5006 (Light Turquoise), and the combo made quilting fun.


Binding is the subtle but lovely Maze Clarity from Katarina Rocella's Imprint, which was also used in some of my blocks and is one of my very favorite low-volume prints.


So there! I am thrilled to have this one out of the way and ready for Christmas, as we all know it'll be here before we know it. Check out other versions of Patchwork Forest on Instagram, under hashtags #patchworkforest and #holidaypatchworkforest. But be careful, or you'll be making one too!


This project was on my 2017 Finish-A-Long Q1 list, so I'm off to link up just in the nick of time!
Also linking up with Finish It Up Friday!