Pages

Monday, June 27, 2022

Stitch Club Kantha Quilt

When I saw a couple of months ago that Alison Glass' new Stitch Club involved making a Kantha quilt, I didn't have to be asked twice. When I participated in the original Stitch Club back in 2020, I learned enough to make a Kantha pillow, and thoroughly enjoyed the stitching. So I happily joined the Stitch Club 2022 Kantha Sew Along in the hopes of making a Kantha quilt, and now I can say I've done just that!

From the Stitch Club Journal: 
"Over time and in different regions the specifics of kantha varies and shifts. Originating in Bangladesh and some parts of India (referred to as Bengali since it is practiced throughout the wider area), it also often reuses cloth from saris or other clothing. It refers rather broadly to a both a traditional embroidery style and a specific stitch, basically an organic running stitch where the emphasis is not on perfection. The stitch creates a gorgeous and charming imperfect texture."

When I last shared about my Kantha progress, I had just finished the 128 rows of quilting. Though not a traditional step from what I understand, Alison suggested tying neighboring threads together for security. After tying, the pairs were trimmed and tucked between the quilt top and backing layers. Remember, a traditional Kantha contains no batting.


The final step, of course, was the hemming. I debated, but finally decided to match my thread to each section, and I'm very glad I did. What a unique look the hemming gives the finished quilt.


My Kantha finished at 52" x 70", and as you can imagine, without batting, the texture and weight is quite different from your average quilt. That said, it's really lovely and drapey, and I like the result a lot. Other than the initial rows of basting stitches, which had to be done at a table, and I found somewhat cumbersome to do, I really enjoyed the hours and hours of hand-stitching. I also appreciate having learned a bit more about the Kantha quilt-making process by making one for myself.


If you missed any of my previous posts about making my Kantha qult, they are linked here:

Fabric Pull + Quilt Top & Back

Basting & Stitching + Quilting


Linking up with Meadow Mist Designs' Favorite Finish Monthly Linkup for June!

Thursday, June 23, 2022

Aurifil Artisan Challenge :: Preston Laptop Case

As a new Aurifil Artisan, I wanted to jump in and join in the first challenge, which was to create a project using our welcome pack. I'd been wanting to try Sotak Handmade's new pattern for a laptop case, so I decided to combine the two. Svetlana's pattern offers four case sizes, and wouldn't you know, mine didn't quite fit the large one, but was close. So I used the handy dandy formula provided in the pattern to adapt the measurements so they were custom for the case I needed. 

The fabrics I used were a pair I had stashed a few years ago, but I couldn't remember why they'd been purchased and kept together all this time. No worries, I liked them for this project, they coordinated with the purse zipper I wanted to use, so I went ahead and cut into them. For the exterior, I used Desert Wilderness by Boccaccini Meadows for FIGO, and for the lining, a print by Rae Ritchie for Dear StellaThe pattern also used foam interfacing, and I had some Soft and Stable by Annie on hand, which worked perfectly. I liked that the case was padded a bit to protect my laptop.

For piecing, I used an Aurifil 50wt I already had on hand - #2021 [Natural White], but for quilting the exterior bag panels, I tried a 28wt #5011 [Rope Beige] from my welcome pack and loved it. The grid quilting is a little more pronounced than with my normal 50wt, and just sewed really smoothly. As suggested in the Aurifil booklet that came with my pack, I used 50wt in the bobbin and it worked like a charm.

I made a couple of small tweaks to the pattern by adding some leather accents - first at the base of the handles, and also as a zipper tab. All were made from leather scraps and I actually used a different scrap for the zipper tab, as it was thinner, and more easily wrapped around the end of the zipper. For all the leather bits, though, I used Aurifil Forty3 40wt #2360 [Chocolate], which came as a cone in my kit. 50wt was suggested for use in the bobbin for Forty3 as well, and I used #2372 [Dark Antique Gold], which to my eye, is a nice medium-dark brown. 

The construction of the case was really straight-forward, and I'm happy to say my laptop fit in it perfectly. In hindsight, I wish I'd left the zipper just a tad longer. I guess I didn't adjust it per my custom case dimensions. But thankfully it still works fine, just aesthetically it might have been nicer a bit longer. 

It was fun to use some new-to-me threads, and I anticipate adding more 28wt to my collection for future quilting, as I really like the look of it. Even though I only used two threads from my Aurifil Artisan pack, it was good to get more familiar with the 28wt and Forty3 and learn what to pair them with for bobbins. And, of course, it was nice to have the new threads work so well with what I already had on hand. I definitely look forward to more thread explorations.

Tuesday, June 21, 2022

Some Little Things

Over the last few weeks, I've snuck in a few small projects. Three were gifts, and the first here - the Wall Pocket - was for my own reorganized stash closet. The pattern is in Sotak Handmade's book, That Handmade Touch. Actually, three of the projects I'm going to show you are from Svetlana - two from her book, and one purchased from her website shop.

Anyway, back to the Wall Pocket. It's a simply-constructed pocket with a leather hanging handle. 


I added a little hand-stamped label on mine just for fun, and the finished pocket is holding supplies in my stash closet. It makes me smile every time I see it, and I want to make a companion for it.


I also needed a handmade gift, and chose to make the Shetland Quilted Pouch, a pattern from Svetlana's website. I made the small version (6" x 5" x 2")  out of original Cotton + Steel fabrics, and left mine unquilted. Those C+S fabrics are fun to mix and match.


Needing a second handmade gift, I chose another project from That Handmade Touch, one I'd made several times before, the 
On-the-Go Project bag. Always a fun one, I luckily found just enough of this print from Lizzy House's Andover Catnap Collection hiding in my stash - a fabric I knew the recipient liked and would appreciate. By some act of fate, I actually had some black leather straps on hand, perfect for this bag. Between those and the drawstring cord, it was a good reminder to keep some bag-making supplies on hand for times such as this.

And lastly, I tried Poppyprint's The Tote Tute, which I'd seen many times on Instagram. Again, I just happened to have what I needed on hand, including a length of 1" cotton webbing for the handles. I used cotton canvas left from a previous project - Emmie K Geo Pop Canvas Chevy in Lagoon, and construction was really fun.


Where the strap ends come together, I covered the join in a square of leather stamped with the first letter in my daughter Rachel's name, just to personalize it a bit. Considering I used the tote as a gift bag for her birthday present, that felt like a nice touch.

I find it fun to make these kinds of small projects in amongst the larger quilt projects. Sometimes they're helpful when I'm not sure what quilt I want to make next. They're also great for exploring the ole stash and finding the perfect combinations.

Monday, June 20, 2022

Kantha Quilted

A couple of weeks ago, I shared progress on my Kantha quilt, and I'm happy to say that with quilting a row or few every evening since, my Kantha is now quilted!


As you can obviously see, the thread 'tails' are left hanging at both ends while the whole quilt is quilted. By the time I stitched all 128 rows of stitching, I had quite a mass of threads hanging off the ends! So now it's time to tie those all off and trim. 


Once I do that, I'll trim the backing to match the front, and it will be time for the final step in the Kantha quilt-making process - hemming the edges. So I hope to be back before toooo long with a finished quilt!

Wednesday, June 15, 2022

Wave Gap

Well I wasn't sure if I was going to manage an entry for the current Curated Quilts' mini quilt challenge, but space opened up, I had an idea, and I was able to make it happen. The palette - soft lime green, indigo, grape, lotus pink, teal, and aqua - I totally pulled from stash. That was the easy part. It seems lately, there are two separate prompts for the mini challenge, in addition to the palette. This time the overall theme of the issue is Negative Space. But then 'gap' was an additional object of inspiration, so I kept both of those things in mind as I created my mini.

As I often do when I create a mini quilt of a specific size - in this case between 10" and 16" square - I create a square outline on my design wall with masking tape, so I have a rough idea of the space I need to fill. Note that the square was 16" this time, and my mini finished at 13.5" square, so it truly is just a rough estimate, knowing that seam allowances and design decisions will affect the result.


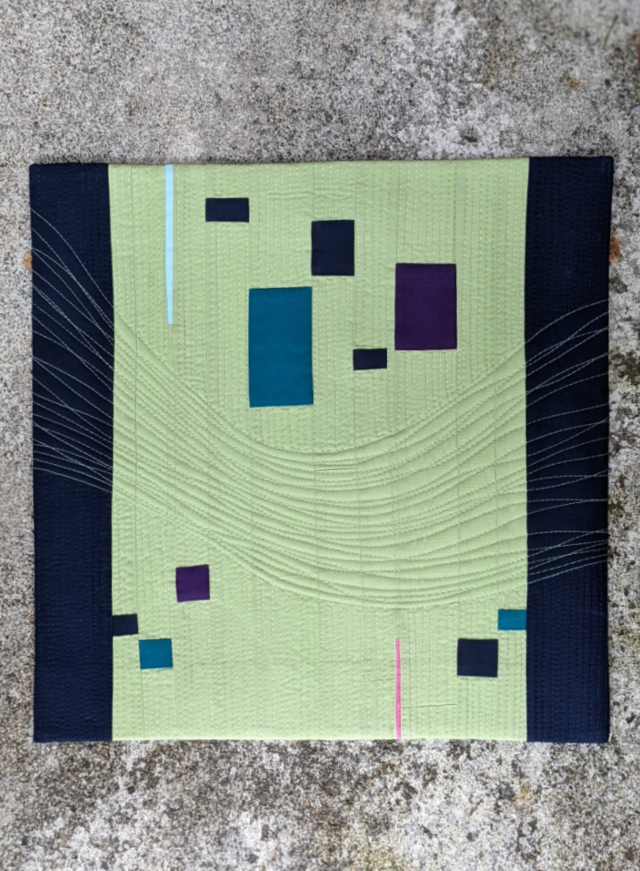
So I began by creating rectangles in three of the palette colors and arranging them with gaps between them and a much larger gap between the groupings. True confession, I had originally intended to quilt some 'ghost' rectangle blocks, but somewhere along the line I forgot about those! Oh well...

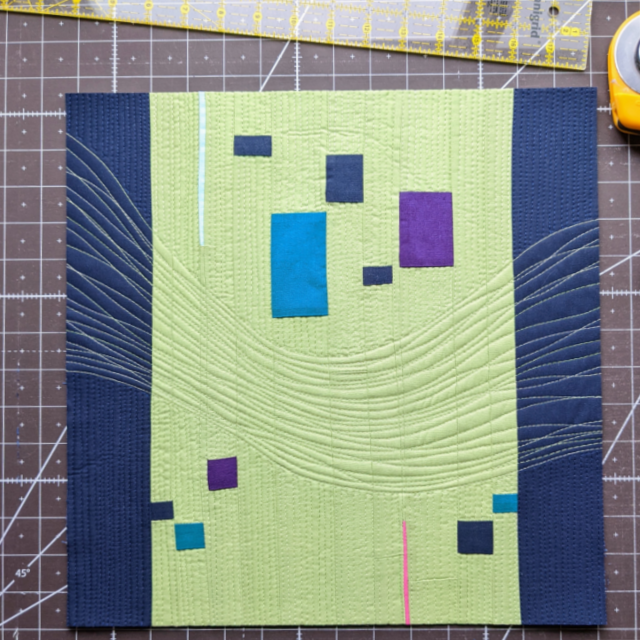
But I still had two colors to incorporate in the piecing, and I did that by inserting a skinny aqua line up top, and an even skinnier pink one below. By that time my piece wasn't quite up to size widthwise, so I decided to create another 'gap' by bordering the focal design with side borders. And then it was time for quilting!

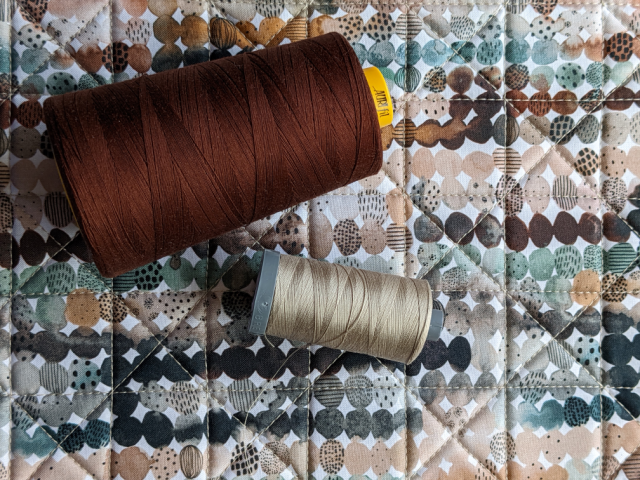
I used two coordinating threads, Aurifil 50wt variegated #3320 [Spring Green] and #2784 [Dark Navy]. With the green, I created a 'wave' in the gap between the top and bottom element, and that was really some fun quilting. I'd spent a few minutes gently drawing with my hera marker, until I came up with outer limits for the wave that appealed to me. Then I got to work filling in, basically using my own Organic Straight-Line Quilting method, roughly following and keeping within the boundaries of the wave. It was at this point that I was really happy for the dark blue side borders, as they helped show off the wave in a way that wouldn't have been shown otherwise.

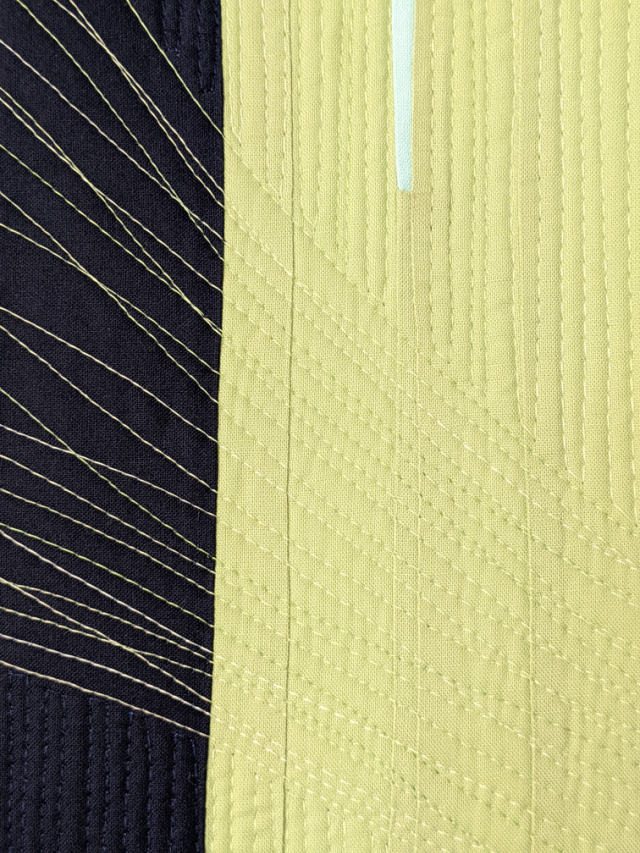
Above and below the wave, I basically did matchstick quilting. Not a huge fan of burying threads, I stopped stitching just shy of the wave, stitched just one stitch over, and then back... over and over again. It definitely created some pretty nice texture.

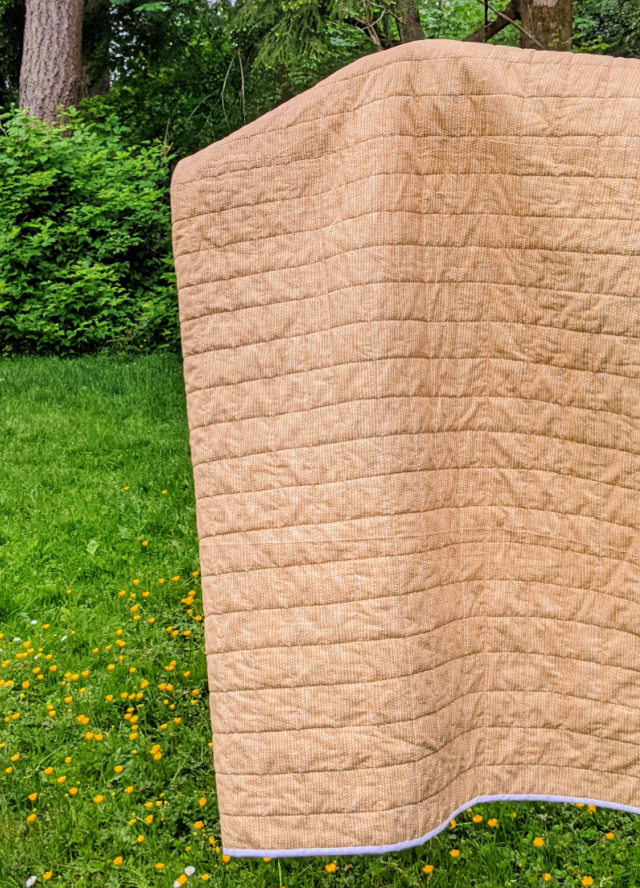
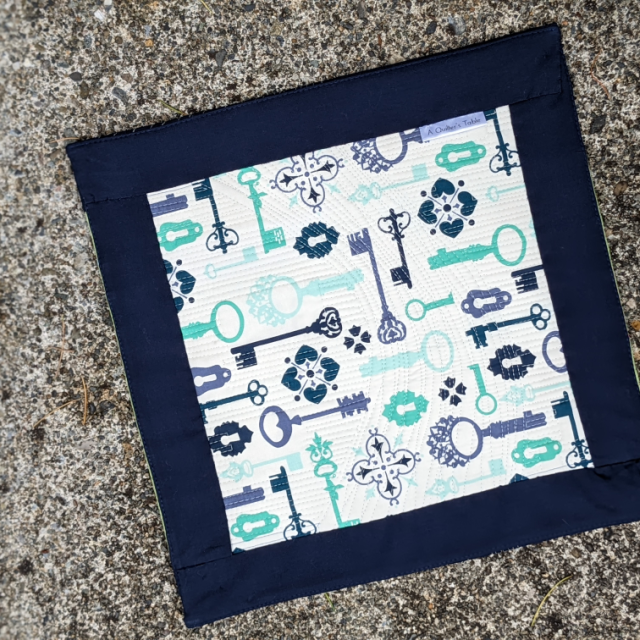
I'd found a fun stashed print for the backing, and once the quilt was trimmed, I finished it off with a faced binding. 

So this isn't exactly where I expected to end up, but I'm happy enough with it. The time spent working on it was creative joy - especially the quilting for a change - and I'm good with that!

Monday, June 13, 2022

Pivot

So with the graduation celebration behind us, I can finally share the quilt I made for our goddaughter, Julia! In chatting with her about the kind of quilt she might like, she suggested a geometric design made in earth-tones - tan, gold, orange, sage. I hunted around for some ideas and shared several possible quilt patterns with her, and she immediately and emphatically chose "Pivot" by Modern Handcraft. I hadn't made Pivot before, but I was happy at Julia's choice, and it was on to considering fabric.

Wouldn't you know, just a day or so later, FabricBubb shared the Wild Forgotton Plus bundle from her shop, which I immediatly shared with Julia, and we were on to something. Much of the fabric in the bundle was from Bonnie Christine's Wild Forgotten line, of course; but there were others too, including a couple of wovens from Diamond Textiles, which added a nict texture to the quilt. There was also a Kitchen Window Woven from Elizabeth Hartman, one of Lori Holt's Cross Stitch prints, and several solids, which I'm pretty sure were Cotton Couture Solids.

I needed just 14 of the fat quarters for the Pivot quilt, and for a background (and binding) I settled on one of prints in the bundle, Aerial in Blush from Bonnie Christine's Gathered collection. For the backing, I used Moonscape in Flax from Dear Stella, which also was in the original bundle, now that I think of it.

Throw size for the Pivot measured 60" x 70", which felt like a nice generous lap. For quilting, I went with a loose (2") grid, using the method I learned from @KitchenTableQuilting (see here; I chose the non-diagonal grid), which always seems to provide a high level of success. Thread was Aurifil 50wt #2021 [Natural White], which was a great match for the background fabric, but not overly obvious on all the focus fabrics.

So this was a fun project, where the sum of the parts - half-square triangles and quarter circles - definitely makes a statement. Plus it was especially nice using the pattern and fabric suggestions from my goddaughter.


OH! On the morning of the grad party, I was about to head off to the store to purchase a gift bag for the quilt, when it dawned on me that I had several fat-quarters of the fabric bundle left. I checked, and yes, a drawstring bag made with four of them would just fit the quilt! That meant that neither side, inside or out, would match, but I went with it, and before long, the quilted gift was all ready to go!

Thursday, June 9, 2022

Yo Yo Rainbow

Boy, it feels like much longer, but the Yo Yo Rainbow stitchalong hosted by Rebecca Ringquist of Dropcloth Samplers, has been going on for just a month, and is now coming to a close. Along the way there have been periodic prompts over on Instagram....

  • sharing our supplies
  • our 'favorite stitch,' and like Rebecca, mine's the backstitch. Which is one reason this sampler has been perfect.... lots of backstitch!

  •  a selfie with our sampler. Yikes. But I played along, and since I'd just randomly found some Tony's Chocolonely (a stitchalong sponsor) chocolate bars, I included a peek of those too.

  •  a progress pic! At that point, I'd finished my circles and started filling around them and IN them, where besides the seed stitches, I added some chain stitches. 

  •  the spot on our sampler that really spoke to us. I had a few, and they were where I'd let one color run into its neighbor just a bit. Kinda love it!

  • the back side of our work. I'm not sure if this is considered messy or neat - maybe kind of in the middle?? 
  • And finally, show our work in progress, which for me happens to be a completed sampler!

Again, I thoroughly enjoyed the Yo Yo Rainbow, especially with its collection of variegated rainbow threads, all size 8 perle cotton from Wonderfil Specialty Threads. I'm pretty sure I'd like to incorporate this finish into another project but not quite sure what yet!