Pages

Wednesday, August 31, 2022

Little Projects

Once again, I snuck in a few small projects during the month - the first two were things I actually needed and am using; the third just to try out a new-to-me pattern. First up were a pair of "Scissor Holsters," inspired  by a pattern in Kraft-tex Style by Roxane Cerda. I'd been wanting scissor guards for the little snips I keep in my handwork bags, and using kraft-tex as a base was perfect, plus I already had some on hand from making quilted bookmarks. Admittedly I made them my own by incorporating leather scraps sewn onto a kraft-tex backing, and also using my leather stamps, which is always fun. The text isn't too visible in the photos, but I can see it just fine as I'm using the scissor holders.

I used Aurifil Forty3 thread with Aurifil 40wt in the bobbin, and the pair worked wonderfully, even with all those layers.


Next up was a little Pixie Basket, a pattern I'd used before from Heidi Staples. I'd taken the one I'd been using at my sewing table to use in my thread storage, so it was fun (and quick!) to make up a new one. Honestly, I think I smile every time I glance at and use it.

And lastly, I couldn't resist grabbing some scraps and making a pair of quarter-circle potholders using Irina/ @nordiccrafter's unique design. 


The leather tag holding the hanging loop was the perfect finishing touch. 

So that's that. I'm just starting in on quilting my Old Italian block quilt, but already have at least one new "small item" I want to make in September. Undoubtedly, there will be more....

Thursday, August 25, 2022

The Old Italian Block

After finishing up my latest bee blocks, I was ready for a new project, and after perusing my copy of Unconventional & Unexpected: American Quilts Below the Radar by quilt curator and collector Roderick Kiracofe, I was drawn in by an Old Italian Block quilt top. I had several red solids I wanted to incorporate into one work, and that really was my thought as I began rummaging through my stash for what to put with them. I happened upon a stash of crossweaves, many bits left from a piece made years ago. Little did I know that I would quickly fall in love with the analogous palette I chose.

The Old Italian Block is a quick make, and I followed the excellent tutorial by Barbara Black/@bbquiltmaker. The tutorial makes a 6.5" block, which actually was quite perfect for the quilt layout I had in mind.


So in between real life stuff this week, I've been making more blocks; and finally last night, was ready to cut some solid squares and see if my original plan was going to work. Happily it really really was.


So now I have a dilemma.... to start piecing a pretty traditional layout, or to turn things on their head a bit. Option two would mean making several more blocks and definitely would complicate the trimming later, but I'm thinking it just might be worth the risk. So stay tuned. I've really enjoyed where this fabric journey has taken me so far, and I'm just not sure I want to stop now.

Monday, August 22, 2022

Jellyfish

Can't tell you how many times I tuned in to the Monterey Bay Aquarium Jelly Cam since Karen/@capitolaquiter shared her jellyfish prompt with Bee Sewcial earlier this month. Like A LOT.

The suggested palette for our improv block(s) was a pieced background in blues and greens. For the jellyfish component, we were to use a range of oranges/yellows with an optional but encouraged splash of lavendar and pinks for interest. Karen encouraged us to "focus on one or multiple parts rather than the whole," so I chose to focus on one of my favorite jellyfish details - what I think are the muscles along the rim of their bell or hood. They expand and release as the jellyfish moves, and I find them entrancing. My first block measured 10" x 14". 


The initial view of this next block is pretty much how I first envisioned it; the second is the actual completed block that I will leave untrimmed for Karen to use as she wishes. It currently measures roughly 11" x 13". For the jellyfish "tentacles," I used the Inset Pieced Strips on the Fly tutorial found on Hillary/@entropyalwayswins blog.


And finally, one last small (7" x 9") block. This is actually the first block I made, reimagined. I wasn't 100% happy with the background of the very first block (not shown), and once I had two new blocks I liked, I was able to go back and re-work that first block. It was inspired by the jellyfish bells and muscles. 


So that was a really fun prompt! Having been to the Monterey Bay Aquarium, and actually seen the jellyfish there, I really appreciated having that real-life connection. The "tentacles" block is by far my favorite. It's clearly an abstract representation, but I can feel the movement I was after. Take a glance at the Jelly Cam, and you'll see what I mean.

Monday, August 15, 2022

Seattle MQG BOM Summer Blocks

Back in May, I finally got started - and caught up - on our guild's block-of-the-month, The Year of Doubles. For no good reason, I set it aside then, feeling pretty good about it all, then failed to touch it again until last weekend. We just had had our August guild  meeting, and so I was reminded, and we also received a new block assignment. Happily, now I can say I'm all caught up again!

June - Ohio Star


July - Arkansas Traveler


August - Dutchman's Puzzle


I'm making my own rules, so though the intent for the BOM was to make a two-sided quilt, one side with traditional blocks, the other with improv blocks, I'm only focusing on the improv. Even so, I kinda feel like these blocks are quasi-improv, as though they are all definitely improvisational, they are all still very recognizable. It's fun fabric-play just the same, and I'm using plenty of scraps, so it's all fine by me. The palette is so unique, but it continues to entice me.

#SeattleMQGBOM2022 
#SeaMQGBOM2022 
#YearOfDoublesBOM 

Thursday, August 11, 2022

Aurifil Artisan Challenge :: Appliqué

During the pandemic, when we did more online shopping than normal, one of the things hubby got interested in was reduced waste items. I think it might have begun with eco-strips laundry detergent, which totally eliminated the plastic jugs our old detergent came in. Another item we tried were TruEarth wool dryer balls. So I'm not really here to laud the praises of these products - though we are still using several of them, and do check out their website if you're interested. But the little (7" x 8.5") bags the dryer balls came in were perfect for a small appliqué project - the theme of this month's Aurifil Artisan challenge. Basically, I wanted to repurpose the bags, cover up the advertising (no offense!) so they could be reused as fabric gift bags.

After mulling over a design to appliqué, I finally settled on Carolyn Friedlander's Bow pattern. Originally designed as a quilt, I printed out the pattern at 71%, which was perfect. It seemed an obvious choice to use some of my CF fabric scraps, and also used Carolyn's method of basting, though I did do mine by machine, where she usually bastes by hand. I'll be sure to try that another time!

As you can imagine, the rainbows were pretty quick to needle-turn. And perfect for the job was a spool of Aurifil 80wt #6722 [Sea Biscuit]. This thread is super thin and sleek, yet strong, and would also be great for English Paper Piecing. It took very little effort at all to hide my stitches with such a thin thread. After I stitched each curve of the rainbow, I removed the related basting stitches, which worked really well, and then I didn't have to dread doing all that at the end.

Once the rainbows were done, I trimmed 1/2" around the top curve, and turned all the edges under and pressed well. I used small, fine Little House glass head pins to place the rainbows on the bags, then appliquéd them on with the same 80wt thread. It worked perfectly, though I did learn two things, unrelated to the thread.

1. With using such a light background fabric, the lettering on the bag faintly shows through on the left rainbow above. 

2. Stitch the bottom of the rainbow first. When I started with the curve, the bottom of the bow shifted ever so slightly by the time I got to stitching it. 

Neither are deal-breakers, but things to remember in the future. Another note - because the bags were already constructed, it was just a tad finicky stitching the rainbows on, basically with one hand inside the bag so I wouldn't stitch through to the back. Appliquing before constructing the bag would obviously be a little simpler. But still, I'm super happy with how they both turned out, and am glad I gave it a go. Plus it felt good to repurpose those cute little bags!

And honestly, I'm glad I had a project that was able to use that 80wt thread, as it's lovely to work with. I'll definitely keep it in mind for my next appliqué project, that's for sure.

Wednesday, August 10, 2022

Let's Eat!

Even though the current Quilt Improv Studio POP Improv Challege guidelines specificially said that we didn't need to create something really similar to Pop Art, I knew I wanted to try, with my first thought being of Andy Warhol's Campbell's Soup Cans. But, of course, not that. Merriam-Webster defines pop art as "art in which commonplace objects are used as subject matter." With that in mind, I chose the lowly fork, an eating utensil we use daily, and I bet you do too.

I definitely wanted to let the 'pop' theme also speak through the fabrics I used. As I mentioned in my July Fabric Usage post, I used the self-curated bundle shown below with the later addition of Kona Rich Red. See that red bit in the green print second from the bottom? That's what confirmed the addition of the red. The overall palette is unique, I agree, but it was fun to work with, kept with my continuing use of Rich Red, and was kind of unexpected. All reason enough for me.


And then, I set to trying to create improvisationally-pieced forks. Let's just say my first attempt wasn't that great. By the way, the first two blocks were about 9" square.


My friend, Louise/@imfeelincrafty gently suggested that including a shadow or outline might improv things, and they definitely did. 


The new blocks were 10.5" x 15.5", a much better size. I wasn't 100% happy, though, and kept obsessing about that section on the right where the corner of the fork's shadow was. I finally settled on a rough method, reconfigured the most grievous one, and just let the rest be what they were as I created them. They ended up with a pretty similar look, but not quite identical. That's improv for you. But finally I had a set of six that I was fairly happy with.


Is it bad to say that one of my favorite things about this piece is the chair print I found to include on the back? It's by Laurie Wisbrun, and I've been hanging onto it for a very long time. I thought it was perfect for the eating theme of this little (30" x 30") quilt, and honestly, gave me renewed energy to get this one finished.


I went with straight-line quilting at 1/4" intervals using a randomly-placed handful of Aurifil 50wt threads - #2115 [Lemon], #2120 [Canary], #1231 [Spring Green], #1114 [Grass Green], and #2250 [Red]. Then I finished it all off with a faced binding.


So was my foray into pop art quilting a success? That's debatable. But it was definitely fun to give it a try! If you want to see how my take on the QIS Pop Improv theme compared to the other challengers, check out the #qispopimprov hashtag. 

Friday, August 5, 2022

Improv eXtra Block

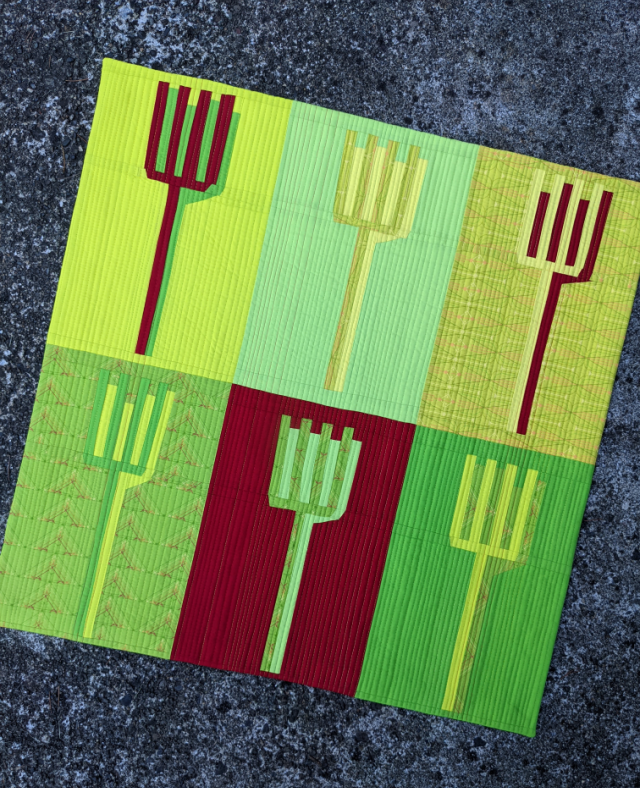
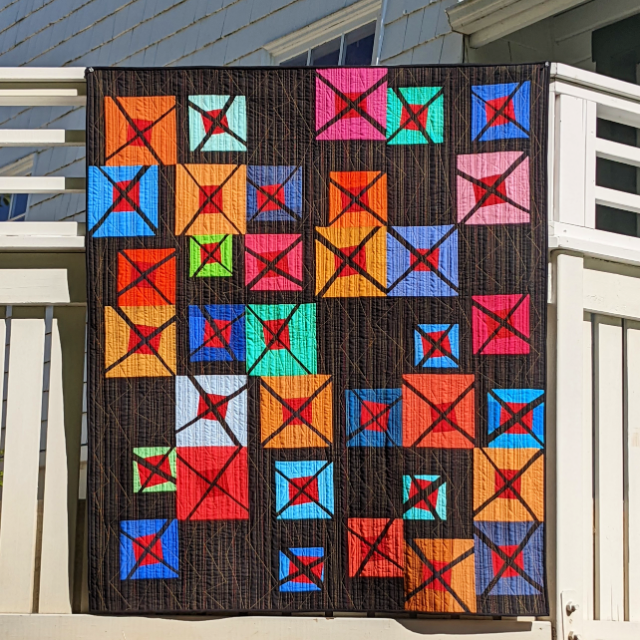
During (and after!) the making of my eXtra quilt, I had a lot of requests for a tutorial for the improv  blocks that make up the design. So here's a quick look at how the blocks came together. Remember, they're improvisational, so exact measurements won't be given. I made my blocks with mostly scraps, and most pieces were cut ruler-free.


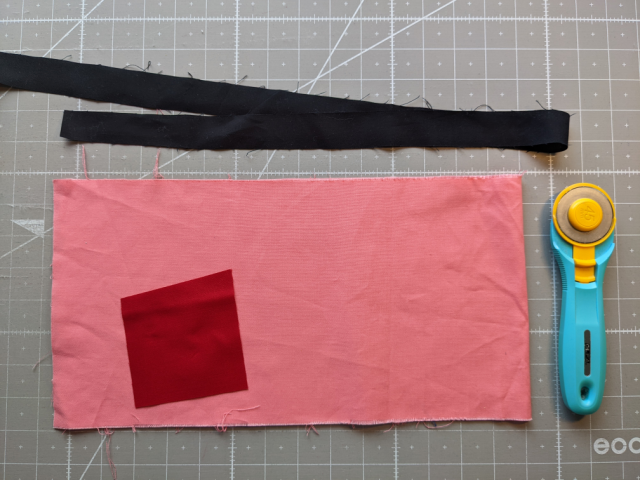
1. Begin with a center (mine were approximately 3-3.5" square), a main contrasting color, and a strip of black approximately 1" wide.


2. Cut an end off of your scrap about the width of your center block.


3. Cut end approximately in half, creating a piece for either side of the center block.


4. Sew side pieces onto the center block, press, and trim long edges if necessary to create straight edges. Cut two lengths from remaining scrap for top and bottom of the block.


5. Sew top and bottom portions onto center strip and press.


6. Use rotary cutter to slice block in half on the diagonal, cutting approximately through the center corners.


7. Sew the 1" black strip along one diagonal edge, trim off excess, and press.


8. Position other half of the block along the edge of the black strip, checking on alignment before sewing. Reposition and pin, if necessary. Sew block into a square and press.


9. Use rotary cutter to slice block in half on the opposite diagonal, cutting approximately through the center corners.


10. Repeat steps 7. and 8. for second diagonal.


11. Now your basic block is complete.


12. To make your block more wonky, place square ruler over your block, angling it slighly, checking to see how large of square you are able to cut. In this instance, I've decided on a 8.5" block. Cut first two sides of your block. Finished block size will depend on the size of the scraps used and the dimensions used up until this point. I chose to trim my blocks into three sizes for my eXtra quilt, but they can be whatever you choose.


13. Reposition your block and rearrange your ruler to cut the remaining two sides of your block.


14. Now you have your completed eXtra block!


Well that was fun, amIright? Be sure and let me know if you give the block a try!