A while back I made a mouse pad for my desk at work and have really been enjoying the fun bit of quiltiness in my office. When I decided to make another for a friend this week, I decided to document it in case you'd like to make one too!

Supplies Needed:
- one plain standard mouse pad, 7 7/8" x 9 1/4"
- cotton batting, 8 1/2" x 10"
- a variety of text fabric strips, cut 1" to 2 1/2"
- one piece text fabric, square or rectangle cut no larger than 3 1/2" on any side (will be used as 'center' of off-set log cabin piecing)
- two pieces of fabric for mouse pad bottom sleeves, cut 6 1/2" x 10", pressed in half so they each measure 3 1/2" x 10"
- backing fabric, at least 8 1/2" x 10"
- typewriter motif for applique (one shown is from Melody Miller's Ruby Star Shining collection, trimmed about 1/8" outside of design lines)
- binding fabric (for single-fold binding, 1 1/4" x approximately 40", pieced as needed)
- coordinating thread for piecing, quilting, and binding
- contrasting thread for raw-edge applique
- needle for hand-stitching binding
- spray-baste (I found spray-baste to be a good way to secure pieces without adding bulk. If you prefer, feel free to use another method.)
Instructions:
Begin by placing the 'center' square or rectangle on your batting, off-centered toward the upper-left corner. I prefer for a good portion of it to show once the typewriter is sewn on. Secure the 'center' to your batting with a quick spritz of spray-baste.

For your first seam, place a fabric strip along the right side of the 'center', lining up top and right side edges. Stitch a 1/4" seam, stopping when you have reached the bottom of the 'center' piece. Trim away the extra length of your strip. Finger-press open, so both pieces of fabric are right-side up. From there, continue constructing your log cabin 'block' by sewing additional strips to bottom, left, top, right, etc., finger-pressing each strip open after sewing before placing and sewing the next strip. The next two photos show the adding of a strip a few rows out.


If your batting becomes covered on any one side, just ignore that side as you continue adding strips until your entire batting piece is covered. Press well.
For your first seam, place a fabric strip along the right side of the 'center', lining up top and right side edges. Stitch a 1/4" seam, stopping when you have reached the bottom of the 'center' piece. Trim away the extra length of your strip. Finger-press open, so both pieces of fabric are right-side up. From there, continue constructing your log cabin 'block' by sewing additional strips to bottom, left, top, right, etc., finger-pressing each strip open after sewing before placing and sewing the next strip. The next two photos show the adding of a strip a few rows out.
If your batting becomes covered on any one side, just ignore that side as you continue adding strips until your entire batting piece is covered. Press well.

Baste your completed piece on top of your backing fabric, wrong sides together, using a bit of spray-baste. Quilt your piece as desired. Trim front and back fabrics even with your 8 1/2" x 10" batting piece if needed.

Baste typewriter motif off-centered on quilted piece, securing with another spritz of spray baste.

Using contrasting thread and a regular stitch length, raw-stitch applique around motif, stitching between design edge and fabric edge (only about 1/8" wide). Slow your machine as you stitch around corners or curves to keep the stitching within the tight margin. Go around your motif twice. It is not necessary or even desirable to sew exactly on top of your first stitching the second time around.
Using contrasting thread and a regular stitch length, raw-stitch applique around motif, stitching between design edge and fabric edge (only about 1/8" wide). Slow your machine as you stitch around corners or curves to keep the stitching within the tight margin. Go around your motif twice. It is not necessary or even desirable to sew exactly on top of your first stitching the second time around.

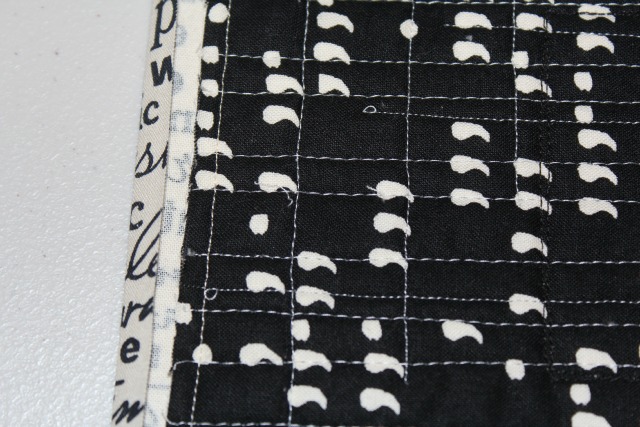
Turn your mat so back is facing up. Place a folded sleeve piece along the right and left sides of the mat, matching raw edges. Sew the three edges on each side (right and left) so sleeves are secured to the back of your mat. I sew just inside the 1/4" seam allowance.

Use single-fold binding to bind your mat. (verykerryberry has an excellent tutorial if this is a new technique for you.) Basically, sew edge of binding around the perimeter of the mat, mitering corners and allowing for seaming where ends meet.


Thanks for the tutorial. Love your fabric. I've been needing one of these for years. Maybe I should make one.
ReplyDeleteI love this piece, and this is a lovely tutorial, thank you.
ReplyDeleteLove all that text...and the typewriter - what a perfect topper!
ReplyDeleteSo cute Debbie. Now I know what I can do with my piece of typewriter ; ) lovely bunch of text fabrics too
ReplyDeleteAwesome! Thanks for the cute tute!
ReplyDeleteGreat tute! And I'm glad you referred people to Kerry's single fold binding tutorial; it got me past fearing/detesting binding to the point that I actually enjoy it.
ReplyDeleteHow fun! I love the typewriter and the text prints. Thanks for the tutorial!
ReplyDeleteWhat a great tutorial, Debbie! Love this project!
ReplyDeleteOoh, that looks fab, love all the different texty prints
ReplyDeleteCute! Do you find that your mouse works normally, even with the not-totally-smooth surface?
ReplyDeleteReally cool! Love the text fabrics and the typewriter!
ReplyDeleteGreat idea. Thanks for sharing. Might just make one for hubby's office when I get a chance. ;)
ReplyDeleteGreat idea! Does the sleeve close or it stays open so it can be taken off for washing? I'm thinking of making some fabric decorated mousepads for my coworkers to spruce up their desks.
ReplyDelete@pril
http://KoolBeenz-blog.blogspot.com
Oh very cute and clever! Thanks for the tute! Very nicely done!
ReplyDeleteSo fun! I have a round mousepad but it is dingy and could use some sprucing up. A slipcover for it would look nice!
ReplyDelete