Thursday, October 30, 2014

R.A.N.D.O.M.

Even though Live a Colorful Life's Really Random Thursday hasn't happened in a while, I still always think of it on Thursdays. And today I actually have some randomness to share, so I figured why not?

Hopefully you caught Christa Quilts' post showing off the Modern Quilt Guild Showcase at the upcoming International Quilt Festival? Very fun! After seeing this impressive collection, I'm even more thrilled that my Fissures was included.
Modern Quilt Guild Showcase Special Exhibit
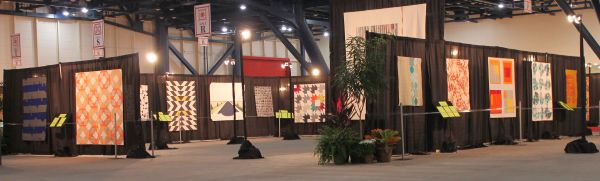
photo credit, Christa Watson

Here's the blurb about the exhibit from the show's online catalog:

The Modern Quilt Guild Showcase 2014
Sponsored by Aurifil USA, Inc.
Modern quilting is a new twist on the traditional art of quilting, and is rapidly gaining interest
from the next wave of quilters. Members from chapters of Modern Quilt Guilds around the
world were invited to submit their works for this popular annual exhibit.

While perusing the Quilts.com site, I came across the results of the Quilting in America 2014 survey. A few stats . . .
  • 10.3% of U.S. households (12.62 million) are home to at least one active quilter
  • 30% own more than 4 machines
  • 86% access the Internet daily
  • 12.2% of quilting households are considered “dedicated,” responsible for generating 60% of quilt industry 
You can see the complete summary here. I think you'll be surprised at some of it!
          From the Quilting in America™ 2014 Survey presented by F+W, A Content + eCommerce Company

The Blogger's Quilt Festival is well underway, and hasn't it been something seeing all those awesome quilts? Just a couple of days left to add your entries. I had high hopes of finishing and entering my current project, but the quilting's been slow-going, so I'll be content with my one entry, and just sit back and enjoy the show.
AmysCreativeSide.com

And as the BQF is winding down next week, Handmade Holidays at Sew, Mama, Sew will be going gung ho. Every day in November, there will be tutorials, printables and recipes to help you create a Handmade Holiday. Here's a link to lists for previous years - all sorts of holiday goodness! And more to come.

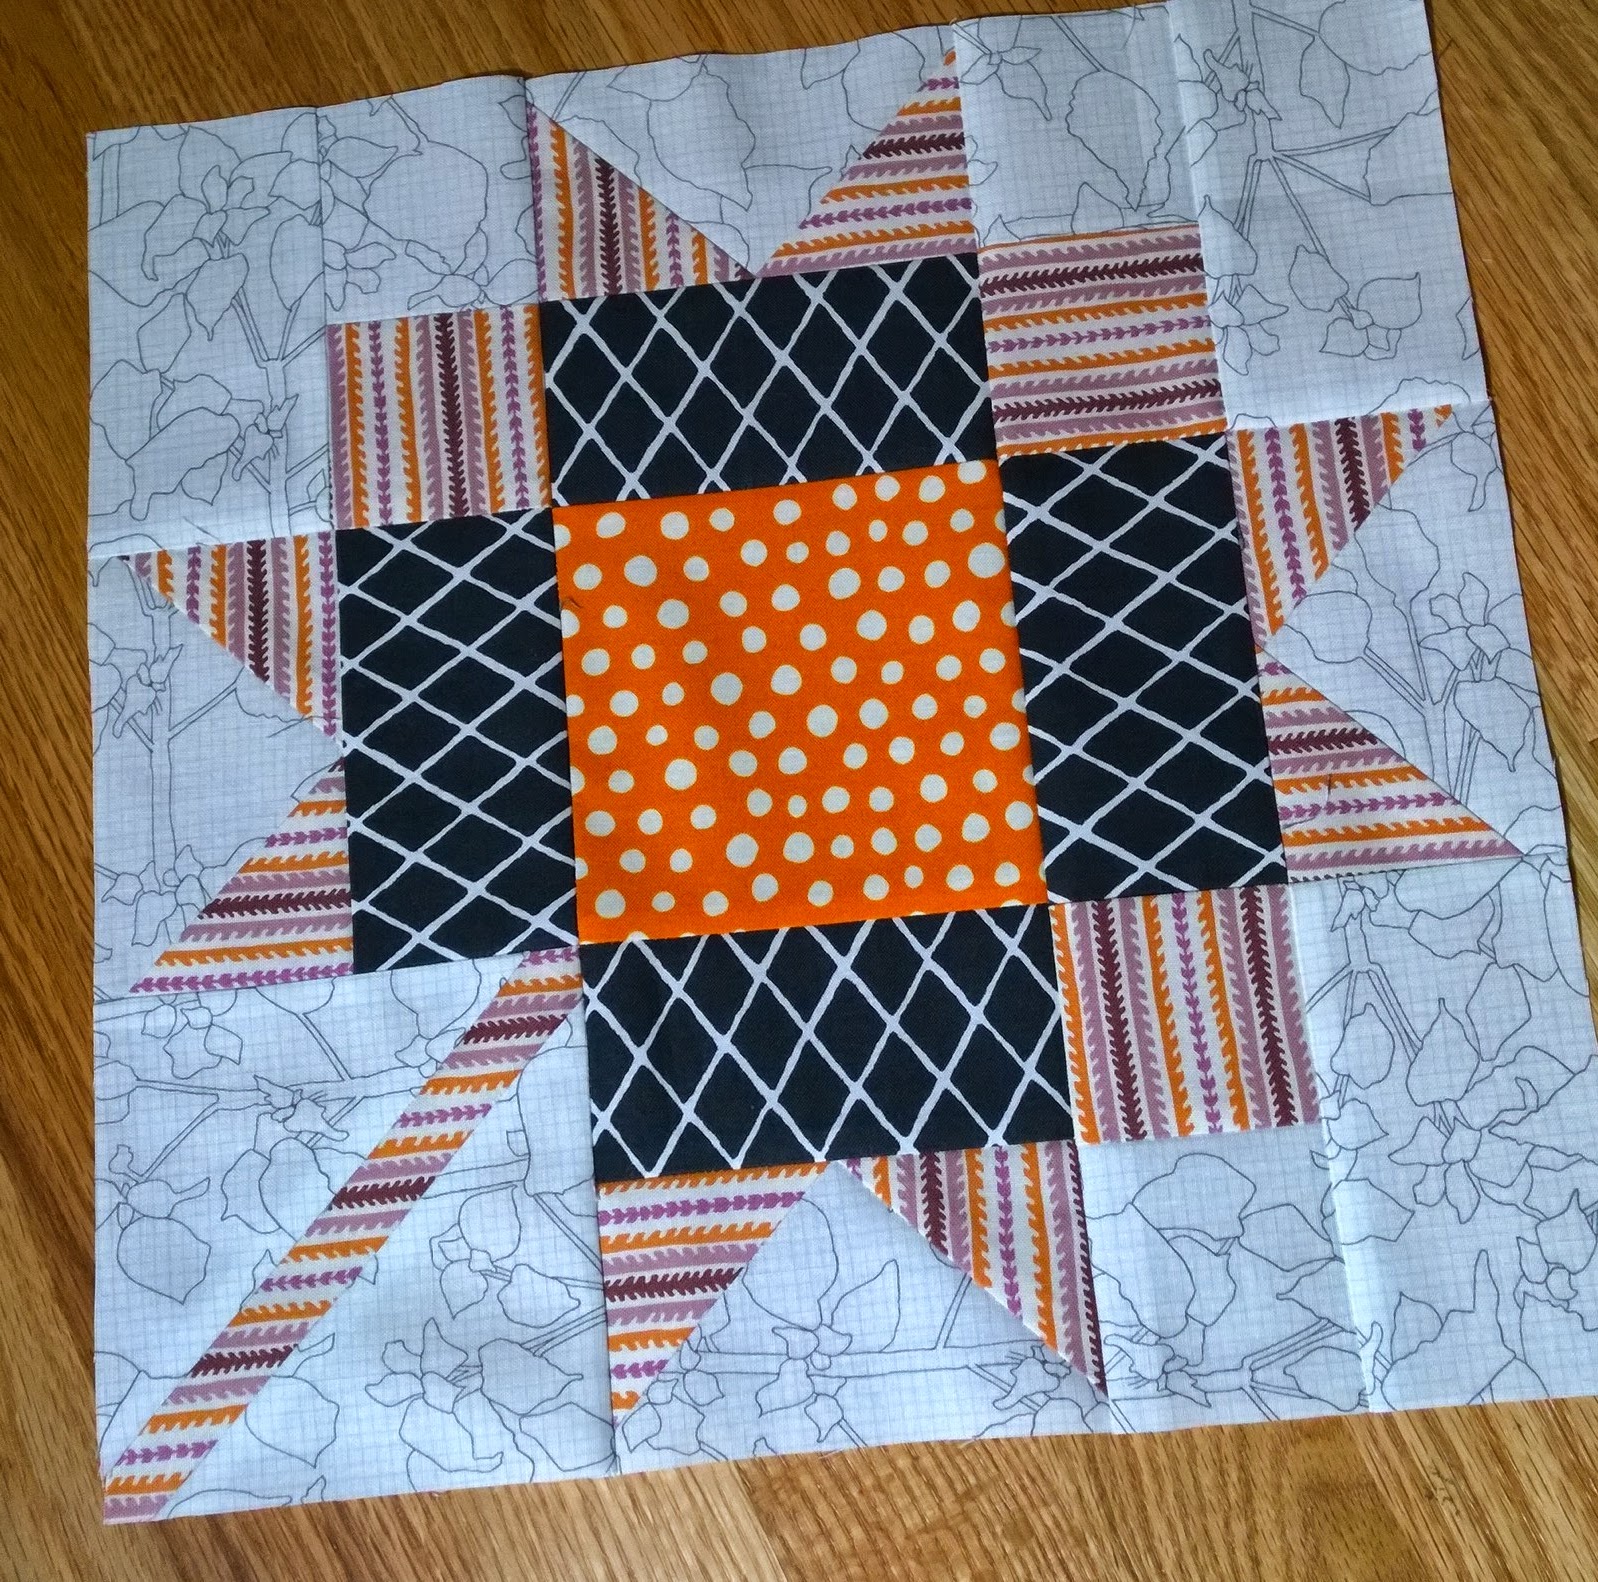
Just a reminder that my A Quilter's Table facebook page is always a good place to find some randomness. I post whatever strikes my fancy, most recently daughter dear's x and + quilt, the latest from shecanquilt, and a fun {and random!} way to hang mini quilts from pieceful life. Check it out! 

Wednesday, October 29, 2014

I Made a Garment

I have the diploma to prove it, but these past couple of weeks I could hardly believe that I actually earned a degree in home economics. Old-school title, I know, but back in the day it included household finance, nutrition, meal-prep and such, and of course, textiles, clothing construction and tailoring. So it was somewhat comical that I experienced so much frustration sewing my first garment in a very long time.
As daughter dear so aptly shared last week, she and I had recently both pinned The Julia Cardigan on Pinterest, and decided to tackle it together on a recent sewing day. Now you should know, Rachel has been actively sewing garments for herself over the last year, where I hadn't sewn one for myself in, say, 30 years. Yeah. So, there's good news and bad news.

Good news: I love pdf patterns. With quick delivery and easy storage, they are almost always my preference.
Bad news: For garments, there are many, many pages. That need to be taped together before (note to self!) cutting them out. The finished pattern was kind of unwieldy, but I managed.

Good news: The fabric I chose was lovely, Robert Kaufman Laguna Cotton Jersey Knit Solid in Pepper. Just my color, and so soft and potentially cozy.
Bad news: It curls! Which made it finicky to cut, piece, and finish. Also, since I rarely prewash my quilting cottons, it didn't even dawn on me to prewash the jersey knit, but Rachel suggested I really should have, so I definitely will if there's a next time.

Good news: The pattern comes with a wide range of size options, which is really great.
Bad news: I made the mistake of cutting out the size that fit my normal 'dress' size, rather than by taking my measurements. Important lesson learned.
Good news: Despite everything, it turned out really nice and is soft and comfy.
Bad news: It doesn't fit me, but thankfully fits Rachel to a T. What a deal, huh?

So this wasn't one of those projects I breezed through, but the pattern itself worked well, and it makes up into a great wardrobe basic. Just for the record though, don't expect to see another garment post here anytime soon. Back to quilting!

This project was on my 2014 Q4 FAL list!
Linking up to Finish It Up Friday.

Tuesday, October 28, 2014

Tuesday at the Table

About the time fall hits each year, soup begins to sound realllly good. So about once a week, it's on the dinner menu, sometimes a tried-and-true favorite, often something new. Other soup-lovers have joined me in tagging #mysoupyoursoup on Instagram. Here's what I've made over the last few weeks . . .

Next I'm hoping to try a new Pinterest find, Black Bean Soup with Cilantro-Lime Rice. (sounds good, right?) Anyway, feel free to add to the growing collection over on Ig or leave a link to one of your favorites in the comments here. I need an idea for next week! 

Monday, October 27, 2014

Blogger's Quilt Festival :: Red Hots {Mini Quilt Category}

Scrolling back through the quilts I've finished over the last few several months, it was Red Hots that beckoned to be shared again. Small as it is, it's one I savored from the moment the fabric landed on my doorstep to the very last stitch of its matched binding. An original design, it was created for the Oakshott Ruby Mini Quilt Challenge hosted by Sew Mama Sew
It was my first time working with Oakshotts, and boy was I dazzled. I didn't have a clear design when I started, but I knew 2 things: 1) I hoped to incorporate some curves, and 2) I wanted to use every one of the colors in the bundle.
So I 'made' some striped fabric from random widths, and beginning with a curved striped column, began creating a design as I went, left to right. When I was happy with what I'd created, I added borders 
And this is where the real fun began. Using nearly every "hot" thread I had, I matchstick quilted in the solid strips and did some parallel diagonals in the striped sections, all with my walking foot.
Luckily, I had enough of my made fabric left to use it as binding, which pleased me to no end. 
So matched binding it was. What a perfect finish to a most enjoyable sew.

Quilt stats:
Finished size19" x 20"
Pattern: my original design
Fabric: Oakshott Ruby Red shot cottons
Thread: a variety of types and colors
Quilted by: myself, using a walking foot 
Helpful tutorials: Cutting and Sewing Free Hand Curves by Red Pepper Quilts;

My previous entries in the Blogger's Quilt Festival:
Unlocked, 5/16/14
Crazy Rainbow, 10/25/13
Absolutely Mod Pop, 5/19/13
HST Love, 5/17/13
Hopscotch, 5/19/12
Mango Revisited, 10/28/11
Supernova, 5/13/11

AmysCreativeSide.com

Friday, October 24, 2014

October Bee Blocks

Bee blocks were short and sweet this month, and I have a new crush. The maple leaf block that Katie/kldemare had That Stash Bee make were just a delight, and I'm trying to figure out when I can make some for myself.


Debbie/Blue.Ridge.Girl chose Social Climber blocks for FAITH Circle, a pattern by Pat Fryer of Villa Rosa designs.
I accidentally cut too many colored fabric strips, so went ahead and made an extra 'combo' block per Debbie's specifications.

Pretty painless, which suited me just fine.

Wednesday, October 22, 2014

W.i.P. Wednesday

It's been about a month since I reported in for W.i.P. Wednesday, but the good news is all the projects listed in that post are done! I'm working on a couple of projects this week, the main one being this mass of color.
I was inspired by both Poppyprint's Chess on the Steps, and All the Colours from shecanquilt - two quilts I keep going back to again and again. It has been suggested the piece I created looks like Montana, and I can't disagree. But I'm planning on trimming it up, adding some borders, and then who knows what - the truest kind of w.i.p.

As leader-enders, I've been making more cross-stitch blocks (tutorial by Pile O'Fabric). I'm working my way through my 3rd Kona Ash charm pack, and when I'm done with that, I think I'll finalize my design. There's no science to what scraps I'm using in these other than size, so it'll be kinda crazy scrappy.

So stay tuned. Lots to be decided to get these two to the finish line.

Linking up with W.i.P. Wednesday at Freshly Pieced.

Tuesday, October 21, 2014

Tuesday at the Table

Due to Scraptastic Tuesday last week, I held off telling you about our family's outing to Bill's Berry Farm, which ended up being a good thing, as it gave me time to do a little 'research' in the kitchen. Long story short, 15 of us met at the farm as part of a fun family weekend, and among other fall farm activities, we made fresh apple cider. If I had ever done that before, I forget. For one thing, I certainly didn't remember how many steps were involved. It took all of us (even the youngest kiddos) about 45 minutes to make 10 gallons to divvy up and take home.
Of course, in addition to "just" drinking it, I had to use it in a few recipes.

  • Next was tweaking my recipe for Honey-Balsamic Vinaigrette:
Honey-Cider Vinaigrette
1 cup fresh cider boiled down to 1/4 cup and cooled a bit 
2 Tb. finely chopped or grated red onion (or a shallot would work well)
1 Tb. honey
1/2 - 1 tsp. Dijon mustard, to taste
1 tsp. salt
a few turns of freshly ground black pepper
1/2 cup extra-virgin olive oil
     Add everything except olive oil into a jar with a tight-fitting lid. Cover and shake well. Whisk in olive oil, cover, and chill until time to serve.

Now caramels aren't an every-day make in our kitchen, but though a little time-consuming, these were not finicky one bit. We just followed the steps one by one, and before long, we had chewy bites of caramel to nibble, and the best of all? They honestly tasted of that fresh apple cider. Keeper!

Monday, October 20, 2014

How You Bind :: The Nitty Gritty Results

Thanks to all of you who took the time to take the binding survey last week. If you don't have time to chat, feel free to click right on over to the results, where you can see the pie charts (also shown below) and all the added comments. I do have just a few comments of my own after you glance at the stats here.


Surprised where you fit in? Surprised at anything?? I was kind of surprised at how many folks secure their binding before they hand-stitch it down. I have never ever done that, so really had no idea it was such a thing. hmm

There were just a few comments that require some further action. First, someone asked, "Any chance you could research or do a tutorial on binding a quilt with the facing technique?" I know immediately what to suggest here: OPQuilt's tutorial, which I've used several times myself with great success.

Now here's where I need your help. Rather than do another survey right away, can you respond to one or more of the questions below in the comments? Hopefully those who asked will see this post and our responses.
  1. How about a question about how gals like to do the miters, top on top or side on top? 
  2. I'm curious, do people press their binding before sewing? After I machine sew it on, I press it away from the quilt top and then hand-wrap it around to the back to sew it on. I wonder what others do. 
  3. I'd like to see you do a survey about HOW to sew binding to a quilt. I bet most quilters don't know that there's another way to attach binding than with folded mitered corners.
My answers: #1: I miter my corners going clockwise on the front, with the side I'm sewing into 'on top.' I'm pretty sure I'm traveling counter-clockwise when I'm stitching on the back. If there's a 'right' and 'wrong' way here, I'm clueless. Please enlighten me. #2: I didn't know till recently that this was a thing either, but now I do do it. #3: I know how to do a faced binding as mentioned above. Please do tell if you're thinking about a different method than that.

So there you go! I'd love to hear what you think about all this in the comments!

Thursday, October 16, 2014

Postcards do.Good

Though I had already made two postcard quilts {here and here}, they both used large-scale prints as focus fabrics. I still wanted to try one more quilt that used solid postcard blocks, so I asked the FAITH Circle of do.Good Stitches to help me out.
We started with this palette from design seeds.

I asked my group to use my Postcard Block tutorial and make:
  • Postcard 'fronts' out of solids within the palette. Some of my bee-mates didn't have the solids, so I asked them to use tone on tone fabrics. 
  • Postcard 'backs' using any shade of gray for the vertical line and text prints for the 2 'halves'. If they didn't have text prints, I asked for 'blank' postcards, using solid white or cream, or white on white. 
  • 6 of each type of block sewn together to make 2 - 12 1/2" unfinished blocks
 Here's one of my sample blocks.
This was a pretty simple top to put together, even though I ended up unpicking 2 blocks down the center, due to my own little design error. An easy fix.

For the back, I had chosen and purchased the purple texty stripe from SUCH Designs before I even got my blocks back. It just seemed the perfect choice for this quilt's theme and mix of colors.
I continued the theme with the quilting, "scribbling" across the quilt using one of my machine's zig-zag stitches widened and stretched. Aurifil 50wt #2021 (Natural White) was a good choice, considering both white and off-white were used in the blocks.
I decided to keep the binding kind of subtle and went with a small-scale text print
Finishing at 48" x 60", this quilt will be sent to Restore Innocence, FAITH Circle's chosen charity, where hopefully it can provide some healing and hope.

Linking up with Finish It Up Friday and Fabric Tuesday.

Wednesday, October 15, 2014

How You Bind :: The Nitty Gritty

The binding survey has been closed. Results will be posted on October 20, 2014.

Remember a while back when I did a binding survey? It was all about different binding choices - fabric, size, techniques. One thing that the survey revealed was that about half of you really enjoy binding by hand. Which is exactly what daughter dear and I were doing on a road trip last weekend. I guess I had forgotten that we, gasp, don't do it the same way!
She (top photo) holds the binding away from her, and uses no thimble or clips or pins. I, on the other hand, hold the binding right next to me, wear a leather thimble, though also with no clips or pins. All this led to an impromptu survey on Instagram, and boy did I get some responses. You can read them if you like - just look for me at aquilterstable.

Which brings me to say - I didn't want to leave you all out! So here's a quick survey for you too. And since I was making it all official-looking, I went ahead and asked a few more questions. For any of you that left comments on the Ig post, I've already entered the data from your comments. Feel free to let it go at that or answer whatever you didn't the first time. I'll leave this open for a few days, and then share the results. If nothing else, I think we'll find there's many ways to get to the same result!

Tuesday, October 14, 2014

Scraptastic

It was a happy coincidence that when I read about the new Scraptastic Tuesday linky at she can quilt and mrs sew & sow, I just so happened to have a scrappy finish to share!
These are Log Cabin Hexi Potholders, made from a free Craftsy pattern by SewCanShe. Aren't they fun? I literally pulled from my scrap basket for these, which was alot of fun. For the backs, I used the same Boysenberry Linen Mochi Dots, which with a layer each of cotton batt and insul-bright in the middle, made for nice sturdy potholders.
You've probably already guessed that a couple of y-seams are necessary for each potholder, but they are quite manageable with Caroline's terrific tutorial. I quilted serpentine lines in a bright Aurifil 50wt #2535 (Magenta) - simple, quick, and fun! Chevron twill tape made perfect coordinating hangers, and without binding, these were a pretty fast project.
As I was making these, I kind of chuckled to myself at the palette I had chosen, as these were made for a family gift-exchange last weekend and not one of them has a pink, orange, and purple kitchen. Well wouldn't you know, my 6'6" brother-in-law ended up with them, and was actually quite excited. Pretty much made my day.
Linking up with Scraptastic Tuesday and Fabric Tuesday.

Monday, October 13, 2014

2014 Finish-A-Long: Q4 List

Goodness. I'm kind of struggling with what to even put on this quarter's list. I've got a few new quilts brewing in my mind, but nothing firm, and for sure no fabric picked out for them yet. So sad to say, I have just a couple of things actually started.

To be finished sooner rather than later is my first item of clothing in a very long time. It's a Julia Cardigan that I started on a recent sew day with daughter dear. She's finished and wearing hers, but mine is still in pieces.

Another project is a quilt made with bee blocks from the Always Bee Learning Bee. I have 50 some half rectangle triangle blocks as well as fabric to make a few more. So of the several stacks of bee blocks I have stashed, this is the one I'd like to finish next.

And only because a stack of half-finished blocks has been sitting on my ironing board for months, I'm going to step out and add my Cross Stitch blocks. I had an idea in mind for this project, and these scrappy blocks may become "it", though maybe not. But I'm going to try to at least make something with them. I like them, I just don't really like making them . . . yeah.

So that's that. Wish me luck.

Linking up with Finish Along Quarter 4!

Tuesday, October 7, 2014

Tuesday at the Table

Well, I've been meaning to chronicle the cooking class hubby and I took while we were in Italy, so before too much time passes, here's what I remember.

We were with our tour group, having spent the morning at an Etruscan Museum in Chianciano Terme, heading to the Chianti countryside for a couple of nights. En route, we stopped at Agriturismo La Pietriccia, where chef Stefano met us in the driveway.
I confess, I'd been looking forward to this since our trip began. To be cooking, in Italy, alongside an Italian chef, sounded too good to be true.

We all gathered in a large room, set up for demonstration and prep work at one end, and for gathering around our meal at the other.

The routine was simple to follow. Chef Stefano would "show and tell" a dish, then direct folks to continue on with that task, as he and the rest of us went on to prep the next dish.
Hubby was the first one to get assigned, working with the chef's brother on our appetizer and dessert. Without really meaning to, I remained unassigned for much of our class, which meant I got to see chef demo almost everything. Which was very cool for a foodie like me. Eventually though, it was my turn, and my dish was ricotta gnocchi.
I had made potato gnocchi once ages ago, but had never made or even tasted ricotta gnocchi. And though the ingredients are quite simple (ricotta, flour, and salt), the technique is a little tricky. In fact it took me a few tries to get it right, but finally I did. Ideally though, this type of gnocchi should be dropped into boiling water as they are formed, which wasn't really possible in class. So after a bit, chef added more flour to all the dough, and showed us a different shape that stands up better, and what you'll see in the mosaic below.
At any rate, the class was alot of fun, and there wasn't a dish we made that I wouldn't be willing to try again at home.
Clockwise from upper left: 
Carrot Tartlet, Pici (handmade Sienese Pasta) with wild boar sauce, 
Ricotta Gnocchi, Potato Cake, Sausages, Cabbage Salad, 
Ricotta Lemon Tart served with the chef's own sweet wine

Indeed, the entire adventure proved just as fun - and tasty - as I'd imagined.

Monday, October 6, 2014

2014 Finish-A-Long: Q3 Finishes

Three out of four finishes for me this quarter. I shoulda, coulda, woulda that last one, but I didn't quite make it. OH well. If you missed them, links to project posts are below finish photos.

With the blocks all pieced, it didn't take much to get my next Postcard quilt sewn together and finished.
So here's the completed quilt. I was curious about the pattern as a larger quilt. This one's 1.5 times wider and twice as long as my original. And I'm liking is just as much. 
On my Q3 list were also 2 table runners inspired by a pattern by Susanne Woods in We Love Color.
Since I was making these runners in custom sizes, there was a fair amount of math figuring out sizes and placements, but they went together really nicely. 

And finally, I really took my time on my latest Spiraled quilt. I was building it on my design wall as the quarter started.

But just in the nick of time, I finished it up.

The last project on my list was another Postcard quilt with blocks made by FAITH Circle. Here's a photo of the completed top, and just yesterday I got it basted, so it shouldn't be long now.

So it could have been much worse. Now to look ahead to the last quarter of the year.