It's been a month or so since I shared about my Kantha quilt, still very much a work in progress. After creating the quilt top [53" x 72"] and a pieced backing, it was finally time to start the hand-stitching!
In preparation for that, we pin-basted the two layers together on a large table top. For me, that was our dining room table, which actually wasn't even large enough, so I carefully moved the quilt top around as needed. Just to remind you - there's no batting in a Kantha quilt! And where with normal pin-basting, you would pin every 6" or so all over the quilt, with the Kantha, we pinned much more minimally, as the 'real' basting was with needle and thread.


Yes, so we left our quilts on the table as we thread-basted every 6" across the quilt. And the great thing about that, even though it was a little akward stitching on the table, was that those lines would stay in the quilt, part of the overall hand-stitching. I chose to use coordinating threads in each section, so I was frequently switching colors. That whole 'basting' process took me several days, with plenty of breaks in-between stitching sessions.
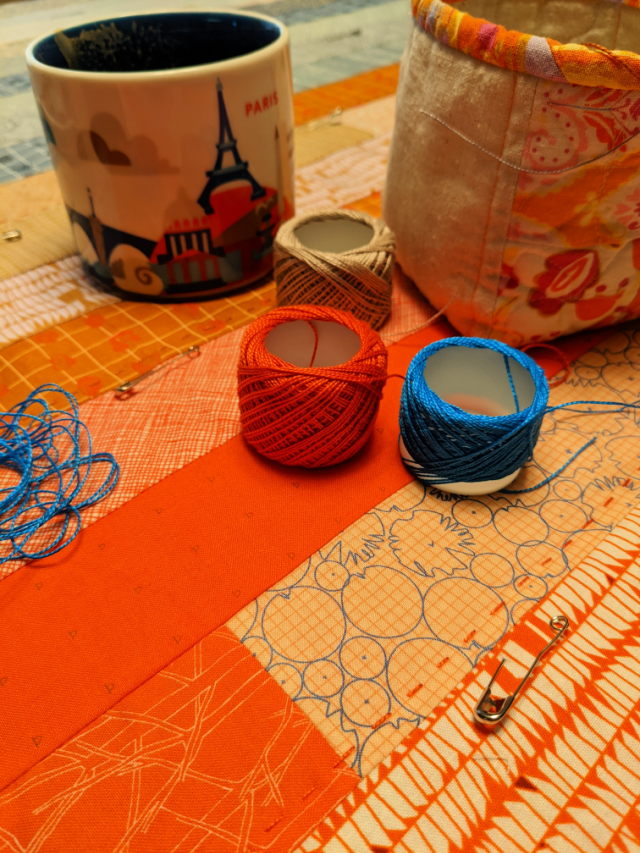
A couple of other unique things about the Kantha process is one - each thread is the length of the quilt top with some extra for tying later at the ends. In my case, each thread is over 6' long! Starting in the middle of each row and stitching out toward the edges makes it totally doable, but it takes some getting used to. And second, the thread 'tails' are left hanging until further along in the process.

So, I'm making good progress, stitching a few rows almost every evening. Here's a veiw from the back side before I really started filling in the rows. Each row of fabric will eventually have five lines of stitching - so that's 128 for me by the time the quilt is done!

It's not the easiest to photograph so you can really see the overall scope of the project, but hopefully these shots give you a feel for it. I'm over half-way done with the stitching now, and it's just looking - and feeling - better and better as I add more lines of stitching.


Thanks for the description of the process. That is a long length of thread to handle and working from the middle out makes a lot of sense. And very interesting about leaving the thread tails for a later step. I bet the texture is starting to be really satisfying as you add more of the quilted lines!
ReplyDeleteI love your strippy Kantha project--the colors are really super nice work in progress...
ReplyDeletehugs, Julierose
Beautiful seeing your work in progress. I love the oranges and blues!
ReplyDeleteThanks so much!!
DeleteYour hand stitching is gorgeous with all that organic texture.
ReplyDeleteAnd your previous post on free art is so fun.
Your quilt is just lovely.
ReplyDeleteThank you Carol!
Deletesuch beautiful stitching. this is going to be a gorgeous quilt
ReplyDeleteGreat post, loved reading the details! It's looking amazing already! And yes, that's A. Lot of stitching but so worth it for the texture.
ReplyDeleteJust lovely, Debbie! You're doing such a nice job. Isn't it almost alarming how quickly the perle cotton balls are emptying?! I'm concerned I'll run out, though having a variety of colors in it has helped. It's great to see your pictures, and know how many rows you'll be stitching. You prompted me to count, and I'll be making 188 rows with only 51 done. Whew. This is quite a project, isn't it? I haven't been doing any machine sewing!
ReplyDeleteSince you start in the middle of the row, do you bury the knot between the layers just as you would if you were using batting?
ReplyDeleteKathleen - kakingsbury at verizon dot net