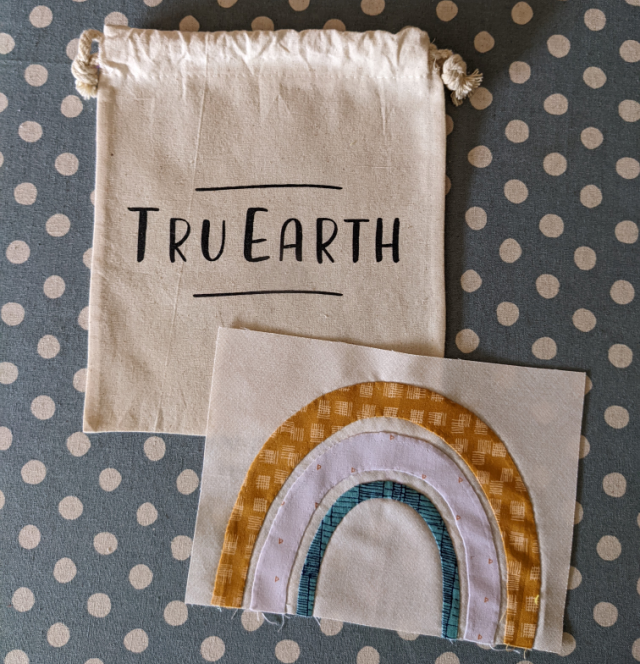
During the pandemic, when we did more online shopping than normal, one of the things hubby got interested in was reduced waste items. I think it might have begun with eco-strips laundry detergent, which totally eliminated the plastic jugs our old detergent came in. Another item we tried were TruEarth wool dryer balls. So I'm not really here to laud the praises of these products - though we are still using several of them, and do check out their website if you're interested. But the little (7" x 8.5") bags the dryer balls came in were perfect for a small appliqué project - the theme of this month's Aurifil Artisan challenge. Basically, I wanted to repurpose the bags, cover up the advertising (no offense!) so they could be reused as fabric gift bags.
After mulling over a design to appliqué, I finally settled on Carolyn Friedlander's Bow pattern. Originally designed as a quilt, I printed out the pattern at 71%, which was perfect. It seemed an obvious choice to use some of my CF fabric scraps, and also used Carolyn's method of basting, though I did do mine by machine, where she usually bastes by hand. I'll be sure to try that another time!
As you can imagine, the rainbows were pretty quick to needle-turn. And perfect for the job was a spool of Aurifil 80wt #6722 [Sea Biscuit]. This thread is super thin and sleek, yet strong, and would also be great for English Paper Piecing. It took very little effort at all to hide my stitches with such a thin thread. After I stitched each curve of the rainbow, I removed the related basting stitches, which worked really well, and then I didn't have to dread doing all that at the end.
Once the rainbows were done, I trimmed 1/2" around the top curve, and turned all the edges under and pressed well. I used small, fine Little House glass head pins to place the rainbows on the bags, then appliquéd them on with the same 80wt thread. It worked perfectly, though I did learn two things, unrelated to the thread.
1. With using such a light background fabric, the lettering on the bag faintly shows through on the left rainbow above.
2. Stitch the bottom of the rainbow first. When I started with the curve, the bottom of the bow shifted ever so slightly by the time I got to stitching it.
Neither are deal-breakers, but things to remember in the future. Another note - because the bags were already constructed, it was just a tad finicky stitching the rainbows on, basically with one hand inside the bag so I wouldn't stitch through to the back. Appliquing before constructing the bag would obviously be a little simpler. But still, I'm super happy with how they both turned out, and am glad I gave it a go. Plus it felt good to repurpose those cute little bags!
And honestly, I'm glad I had a project that was able to use that 80wt thread, as it's lovely to work with. I'll definitely keep it in mind for my next appliqué project, that's for sure.


e640.png)


Great stitching, clever idea and recycling too!
ReplyDeleteThanks for the info on the thread you used to make these very cute bags. I've always used regular sewing thread for hand applique and it's a challenge.
ReplyDeleteFor publicity, Tru Earth could hold a contest for how to upcycle their bags. Yours are certainly an inspiration.
You are so welcome, Carol! I'm pretty sure you'll enjoy the 80wt for applique as much as I did! And you are right - that would be a fun contest to see. haha
DeleteI have the wool dryer balls (different company), and I'm pretty sure I still have the bag. Now I need to find it and try this. I'd like to hear your thoughts on the laundry detergent. I've thought of trying it, but we have hard well water, so not sure if it would work.
ReplyDelete