Tuesday, August 30, 2016

Colorless

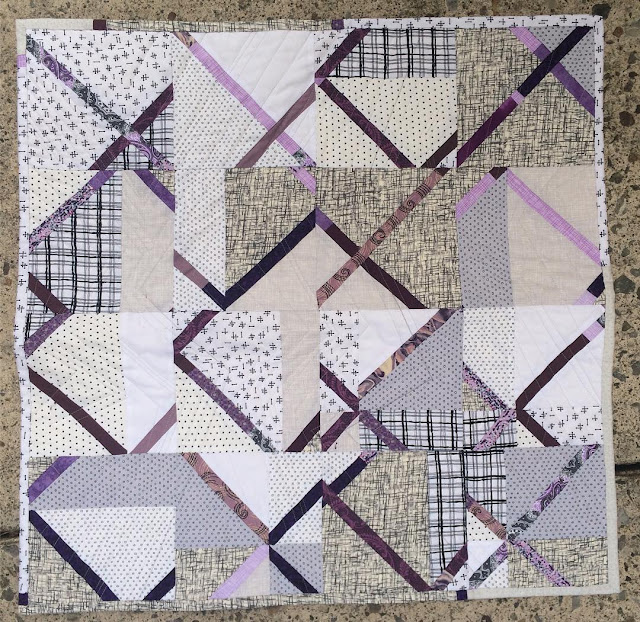
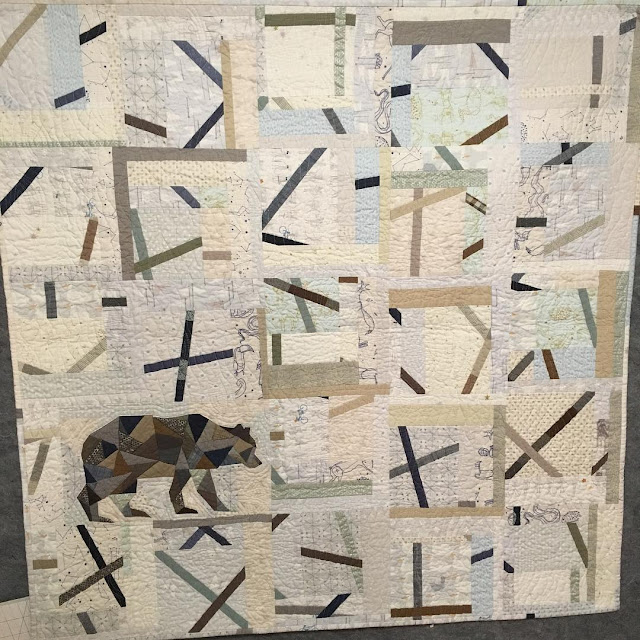
I did not expect to love this quilt as much as I do.


Back last September when Caitlin/Salty Oat announced the Modern Sampler quilt along, I was awed by Yoshiko Jinzenji's quilt and pretty much jumped in not really knowing what I was getting into. But from day one, I planned on working in a very neutral palette, which was part of the challenge, and something that drew me to it. Through the months I somewhat regretted my choice to go completely neutral, as I saw the work of others, and I loved what they were doing with small bits of color. But I stuck with my plan, even though late one night towards the end of making blocks, I was over-zealous sewing from my scrap basket, and some dark gray snuck in. Rather than take it out when I realized what I'd done, I let fate have its way and embraced it going forward.


If I'd paid more attention at the out-start, I would have realized that templates would play a key role in the making of this quilt. I would have noticed that every block had one, if not two mitered borders. If I had even read through the pattern booklet, I would have definitely detected that elements of applique (made with templates) were called for once the borders were on. Seriously, any one of those things probably would have turned me off right then and there. I'm so glad I wasn't paying attention.

Truth be told, on every block, if there was a way to construct without a template, I did. For a few blocks, I created my own paper-piecing templates, and for some I just measured and cut. Let's just say, some of these blocks had alot of little pieces! But mitered corners became second nature in no time.


Once the blocks were done, I kind of broke QAL rules and went full speed ahead. I think I could see the end in sight and just went for it. Borders, something I very rarely incorporate into my quilts these days, seemed important with this one, and while I was struggling with what to choose, I stumbled across Modern Background - Paper from Zen Chic at my local shop, bought the rest of the bolt, and from the moment I held it up to my quilt, I was certain I'd made the right choice for me. 


I was warmed up from doing applique during this month's Mighty Lucky challenge, so doing what needed done to finish this quilt top was more pleasure than drudgery. There were 12 pieces to be added, in a variety of shapes and sizes ranging from 1/2" x 1 1/2" to 2" x 20". As with the blocks, I either traced the needed shape from the pattern, or used good old ruler and rotary to cut what I needed. I've tried to show you in the two photos below where those applique pieces are, as it's not always necessarily noticeable.


For backing, I continued with the neutrals, piecing together large swaths of the Zen Chic and Latifah Saafir's Grafic Chain Link Fence in Birch, with an unknown stripe. I'm so glad I kept the back as quiet as the front.


When it came time to quilt, I thought the simpler the better. With so much detail in the blocks, I felt straight-line would do them justice without overwhelming, and I quilted every 1/2". I did choose to add interest by using three much-loved neutral threads: Aurifil 50wt #2021 (natural white), #2310 (light beige), and #2600 (light gray). There's no doubt in my mind they made this quilt better. The subtle tones somehow became even subtler yet, and the resultant texture downright alluring.


It finally came time for a binding choice. Thankfully I had just enough of that Zen Chic left to do a chunky 1" binding, the same width as those smaller mitered borders on many of the blocks. Something about it just sets it all off for me. Finishing at 51" x 65", this quilt was truly serendipity at its finest. So much about it would not have been my choice to event attempt, but I'm convinced it was important for me to do.


This quilt is from my Q3 Finish-A-Long list! All photos were taken at Heritage Park, Lynnwood WA.
Linking up with Finish It Up Friday and 2016 FAL Q3 Finishes Link-Up.

Wednesday, August 24, 2016

On Naming Quilts

Quilting was my creative past-time of choice for many many years before it ever dawned on me to name them. It wasn't until late in 2011, well into my first year of blogging, that I named my first.

Up until that time, my quilts were known by the pattern used to make them. But when one creates their own, that doesn't work so well, now does it? Mango was my inaugural 
design, the color of  the fabric in that top right ring, a favorite of the recipient. Not too clever, right? But giving it a name at all brought a new dimension to my work, and somehow naming became more important after that.


Now it's rather routine for me to name a quilt when it's complete, and though I really enjoy adding that bit of personality, it's not always easy! And sometimes I'm happier with my choice than others. Mulling this all over the other day, I thought it would be fun to share some quilt names - and the quilts of course - that I'm especially fond of.

"Pinky-Swoon" front


ástərisk was fun in that I used the phonetic spelling even when entering it in a quilt show. The registrar questioned me on it, but I kindly insisted that I had written its name correctly.

Once when I was stuck for a name, I couldn't resist following the lead on some artwork I'd seen, and named this one Untitled in Green.


Naming is such a personal thing, and for me, can be influenced by a color or a shape, a technique or a feeling. Sometimes I know a quilt's name as I begin to cut fabric; other times it'll sit for days after completion before a name comes. How about you? I'd love to hear about your own experience naming your quilts. How about sharing a couple of your favorites in the comments, and better yet, include a link to your quilts!

Monday, August 22, 2016

Improv for Good

It's always fun to announce a new giving quilt plan for the Seattle MQG! And this time we are using beautiful American Made Brand solids courtesy of our local Clothworks. The colors chosen are the same as the logo for our intended recipient for this quilt, Homeward Pet Adoption Center. Specifically, they are (top to bottom in photo below) dark blue, brown, dark eggplant, and white. Bundles for those interested in participating consist of 1/16 yard of each of the colors, and 1/8 yard of white. The assignment is to make original improv blocks using two or more of the fabrics in the bundle only, in one of three sizes: 6 1/2" square, 6 1/2" x 12 1/2", or 12 1/2" square.

Fresh from doing improv quarter-circles for my #seaSLABbom, I started off similarly for my giving block, though in true improv fashion, it turned out quite different than the idea I started off with. Fair enough, right?


Though Louise/I'm Feelin' Crafty and I were a little skeptical about the palette at first, these colors really do look great together! Blocks are just beginning to pop up on Instagram under the #seamqggiving hashtag, and I'm really looking forward to seeing more!

Friday, August 19, 2016

Crosscut Showing Three

Even after sharing the first and second collections of completed Crosscut quilts, they still just keep coming. With today's grouping, the finishes from the over 100 participants in the Crosscut Quilt-Along total 43. And every one is special in its own right. Come and see!


Aren't they fun? If you haven't tried the technique yet and want to, just check out the tutorial and give it a go! All these beauties and more can be found under the Instagram hashtags #crosscutquiltalong and #crosscutblocks.

Thursday, August 18, 2016

Slab Seven :: Quarter Circles

Lucky for me I had a free evening last night, since the latest #seaSLABbom assignment popped up in my blog reader yesterday. This month it's improv curves, specifically quarter circles. Matt/odditease suggested referencing a tutorial from Lindsay Conner on Craftsy. I read through it, then grabbed my rotary cutter and didn't look back.


It measures 20" x 30" and I can't say it's my favorite slab of the bunch, but I think it'll play with the others just fine. I'm kind of anxious for that day to come!

Wednesday, August 17, 2016

Modern Sampler :: Borders and Applique

Whoa. Borders have not even been a consideration for the majority of my work the last few years, but Yoshiko Jinzenji's Modern Sampler Quilt calls for them. Since I really wanted my quilt bigger than the 12 blocks would give (36" x 48"), there really was no question this time.


What fabric was in question though, and I hadn't really given it much thought yet when I happened upon a favorite Zen Chic print from Modern Background - Paper, and the decision was made.


So the borders are on, bringing the quilt to 51" x 65", and now I'm working on the applique. There are a dozen pieces to be added - ranging from 1/2" x 1 1/2" to 2" x 20", including one very oddly-shaped, which I've already successfully sewn on. yay. 


So as I stitch on the remaining bits, I'm mulling over what kind of quilting I might want to do. Suggestions welcome!

Monday, August 15, 2016

A Little Punchy


Yeah, I wasn't overly thrilled when I saw that this month's Mighty Lucky Quilting Club
challenge was totally applique. But after reading through Sarah Fielke's "Favorite Pieced Blocks as Inspiration for Applique," I was not only intrigued, but interested enough to start in on a plan.

I had just randomly purchased some Kona Punch, and just for fun, decided to build my project around that. The green and aqua were unidentified stash finds, and of course the background is from Latifah Saafir's Grafic.


As much as I whine about applique, it's not that I haven't done it. In fact I've made at least two large quilts in days gone by that were completely applique. But seriously, it's been years.... and for some strange reason, as much as I used to enjoy that kind of slow stitching, these days I'm inclined to sew much faster.

But that wasn't the assignment here, now was it? Applique was the name of the game, and I started in with the method I'd used years ago - drawing shapes on my fabric, cutting a rough 1/4" around them, then pinning to my background with short pins, with the intention of folding under along those lines as I stitched.


But I'd seen daughter dear do something different when she appliqued, and in conferring with her, was reminded to reference Carolyn Friedlander's Savor Each Stitch: Studio Quilting with Mindful Design, and there Carolyn suggested machine basting 1/4" from the edge of each shape, and then turning under 1/8" as you stitched. Similar but different and to me, new-fangled and worth a try. Since I'd already marked and trimmed my shapes though, my measurements weren't quite like Carolyn's this time, but I tried the general method at least.


I chose to remove my basting as I sewed on each shape, and without those little pins, the whole piece was very comfortable in my hand as I sewed. The finished piece is 17" square, just like my other Mighty Lucky challenge projects. A slightly askew quarter log cabin block, with logs separated somewhat, I quilted it with an equally wonky quarter-log cabin design. 


Though overall a pretty simple little quilt, it was a very good reminder to me to keep trying new (and including old) techniques in my work. And that applique? Thanks to a recent road-trip where I couldn't access my machine at all, I found it most enjoyable, and much like riding a bike....

Friday, August 12, 2016

Sewing Mini Again

A couple of Christmases ago, I made what I thought was the perfect gift for my Sweden-loving friend, a Dala Horse Pillow, and as expected, she loved it. Fast forward to last week, when she admired the new mug rug I had on my desk at work, and asked if I had a collection of mug rugs. (I do.) She said she could use one and what she'd really love was one with another Dala Horse. I smiled, thinking to myself, "uh, that would be a mighty small Dala!"


But I went home and looked at the pattern by Stitched in Color, and realized I'd only have to downsize the pattern by 50% to get a 6 1/2" block. And you know? It went together flawlessly.


I found a perfect blue in my solid scrap bin, and got to try my hand at sketch stitching again, which adds some fun detailing. I thought something else was needed to finish it off, so I quilted it with a grid and added a fun blue dot backing and wide binding.


So that was a pleasant diversion. It was kind of fun to squeeze in  a little on-demand sewing.

Wednesday, August 10, 2016

Crop Circles


When I started working on this quilt, I may not have expected to enjoy sewing the curves as much as I did, but I totally knew I'd relish working with those greens!


Even though I really wanted to make this quilt, inspired by a photo of crop circles I'd seen online, I was having second thoughts, considering all those curved blocks. But using Latifah Saafir's The Clammy 12" ruler made this project very doable for me. What a relief!


For backing, I pieced together even more of those stashed greens.


Quilting was a dense grid with a delightfully variegated Aurifil 50wt #3320 (Spring Green), which was subtle, blending here and showing itself there .... all quite perfect.


Crop Circles finished at 60" square, and was a really satisfying project. Actually, it's proof positive that if you get a quilt idea, you might as well go ahead and try it!


This quilt is my first finish from my Q3 Finish-A-Long list! Linking up with 2016 FAL Q3 Finishes Link-Up.