Sunday, November 30, 2014

Handmade Holidays

All month long, it's been Handmade Holidays at Sew, Mama, Sew. Hopefully you've gotten some ideas for gift sewing, and maybe even a recipe to try or a printable to have fun with. Today the month-long holiday extravaganza wraps up with my round-up of Last-Minute Gift Wrap + Tags. I hope you'll check it out!

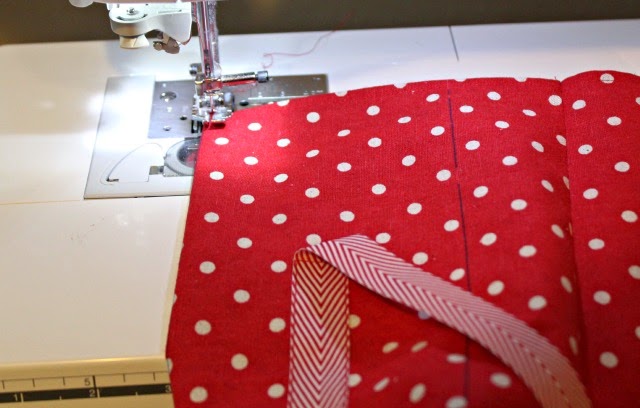
You hopefully saw my tutorial the other day for Trim-Tied Gift Bags. I couldn't resist making one more for you, with a couple of tweaks.  
First off, if you've seen this delightful fabric, a canvas called Light a Candle from the Moonlit Collection by Rashida Coleman Hale for Cotton+Steel, you may notice right off that it's directional. And that may cause just a little issue for you when using the original bag tutorial. All you need to do is cut your fabric in 2 pieces, rather than on a fold, adding 1/4" to the length of each piece. Then seam the bottom, making sure the 'top' of your design is facing away from the seam on both pieces of fabric. {Actually this comes in handy even if your fabric isn't directional, but when you don't have enough fabric to accommodate a fold.}
Another tweak I made was to make this bag larger. Though the photo up top looks like it's lunch-bag size, it's actually smaller. Rather than the 8"x21" I cut in my original tutorial, for this version I cut 2 pieces of fabric, each 10" wide x 12 1/4" tall, and seamed the bottom. I cut the trim (the 5/8" Striped Edge Woven Cotton Trim I told you I was going to try out) 40" long, and I kept the depth of the bag the same, cutting out 1 3/4" corners for the gussets, per the tutorial.

So have fun with the gift-wrap and tag tutorials in the round-up! I know I'll be using most of them for my own gift-wrapping this year!


Linking up with Finish It Up Friday.

Saturday, November 29, 2014

Gift Wrapped

No lie. The moment I saw Rachel/wooden spoon/Wooden Spoon Quilts post her fabric pull for The Great Pillow Fight, I hoped against hope that it was for me.
Possible fabrics for my GPF partner
As her project progressed, my feelings didn't waver one iota. There were definitely other pillows that I really liked and totally would have been happy to receive, but Rachel's was right-on per my request for something that coordinated with 2 pillows I made earlier in the year.
Beside that fact that Rachel's fabric choices fit to a T, there was also the little detail that I had made my "Christmas Snowflake" pillows using Rachel's own tutorial! Get that little connection there? {smile}

I'm not one to venture out shopping on Thanksgiving weekend, so I've yet to get a pillow form, but I swapped one out from the green pillow so you can see how nicely they go together. The new pillow cover is the same 20" big, too - perfect!
I absolutely love Rachel's "Gift Wrapped" block design {here's her tutorial} and fabric choices, right down to the Cotton + Steel binding. The natural colored fabric is Lecien yarn dyed melange, a fabric I wasn't familiar with but sure do like! (It is 100% cotton, a cross-weave fabrics that gives the look of linen with a very soft texture.)
To make a great thing even better, I also received some delightful swap goodies, including the most precious patchwork bag that Rachel made using s.o.t.a.k handmade's tutorial, the patchwork being her own special touch. wow.
So yeah. I'm pleased and then some. SO fun.

Friday, November 28, 2014

do.Good Intersections

So it's my turn to plan FAITH Circle's December quilt. Yes, I'm just a tad early, but considering how busy the next few weeks will probably be, I figured it would be doing my bee a favor to at least let them know the plan. Well, it's only been a week since Ashley/Film in the Fridge posted her intersection quilt, and subsequent block tutorial. Then and there, I knew it would be a great choice for our next quilt.
Here's the palette I've chosen, courtesy of design seeds.
color wave
I can seem to resist these cool colors, can I? I'm asking for pale or medium blue, aqua, pale gray, yellowy green or light lime, and creamy white. And my bee-mate Anita/RhubarbPatch/bloominworkshop jumped right in and already made her blocks! Aren't they terrific?
Dec. blocks for #faithcircle of #dogoodstitches Thanks Debbie for the chance to get them done early! @aquilterstable
I'm feeling good about this!

Wednesday, November 26, 2014

Studio Two :: Design Wall

It may not look like much, but this 60"x80" flannel board is my new pride and joy! In other words, I have a new design wall! You may have seen my previous thread-covered batting, which has served me oh-so-well for the past few years, but I was just ready for something fresh and new and bigger.
Hubby chipped in to help by going supply shopping after I sent him a link to the Design Wall Awesomeness that Sew Katie Did created. I followed her lead and ordered a king size flannel sheet to cover my foam-board. Since Katie said that Anya said that Kaffe said this gray was a perfect color for a design wall, I was certainly game to try! And I love it! With the new wall and a freshly covered ironing board, the studio is looking pretty spiffy.

Tuesday, November 25, 2014

Tuesday at the Table

Something happened the other day, and it seems so minuscule in the big scheme of things, that I hesitate to share it. But I can't quite get it out of my mind. It was an unexpected foodie moment, the very best kind of all. So just because it was a bright spot in an otherwise mundane week, I'm thinking I should write about it.

Where I work (a church), funerals are frequent. And usually, thankfully, the largest part I play in them is creating the bulletin for the service, and organizing all the players that make it happen - you know, the pastors, musicians, sound techs, reception coordinators, and the like. Which is all I did for the funeral that took place last week. Except that I was working at the reception desk while it was going on, so I saw the family and friends gather, and I overheard the beautiful music and the meaningful sermon. I learned that the deceased was actually a pretty big deal in the Seattle commercial crab fishing industry, and though I already knew him to be a very generous man, I was touched by the stories I heard that day - more about him than I knew before.

So I was already feeling kinda sentimental as the reception was starting up, and was taken quite off guard when a coworker came by with an exuberant, "You have GOT to try the crab bisque!!" What? Well I knew the reception was catered and that was all well and good. But noooo. In addition to all that, there was crab bisque made from the family's recipe. Ok! The words 'family recipe' are kinda sacred to me, and I love hearing what recipes families treasure. So of course, I was pleased as punch to have some soup brought to me (plus a pastry from the best Danish bakery in town, oh yeah!)

The soup came to me in a paper cup no less, but as a few of us sipped our bisque there in the office, what had been a basic Friday became something pretty special. I mean this soup was GOOD. One of my coworkers went so far as declaring it on the top ten list of best things he ever ate! wow. So of course, emboldened by the moment, he went and asked for the recipe. Now he may get it or he may not (fingers crossed though), but beware. Noteworthy foodie moments can happen when you least expect them, and they most certainly don't have to be fancy. Like my bisque in a paper cup. Like this post - alot of words and one mediocre photo. But the memory? Life-giving.

Monday, November 24, 2014

Trim-Tied Gift Bag


This little gift bag idea has been on my mind for a while, and with the holidays coming up, I thought now was a perfect time to finally get a tutorial written. So without further ado, here's the Trim-Tied Gift Bag.

Supplies needed: 
  • 1 fat-quarter non-directional linen-blend fabric, or a piece measuring 8"x21"
  • 1 1/4 yd 3/4" twill tape

This tutorial makes a bag measuring 3 1/2"x4"x8" when fully open.

1. Fold an 8"x21" piece of fabric width-wise,  wrong sides together. Place fold nearest you. Fabric should now measure 8"x10 1/2". Using a removable marking pen, mark parallel lines 2" from each side. Flip fabric over and repeat on the other side.

2. On one side, mark 1 3/4" squares in bottom corners. 

3. Using fabric scissors, carefully cut away bottom corners, leaving center fold intact.

4. Open up fabric and lay wrong-side down on table. Find center of ribbon length and place on fold of fabric. Lay ribbon down center of bag, pinning about 4" from each end. If needed, use fabric glue to hold ribbon in place while you sew, or more pins. Stitching 1/8" from ribbon edges, sew ribbon onto bag fabric, overlapping a few stitches at the end to secure.

5. Take your piece to the ironing board, and double-fold each of the ends towards the back side 1/4", keeping ribbon ends out of the way. Stitching close to each edge, make a narrow hem on each end.

6. Now fold bag right-sides together, and sew side seams using 1/4" seams. Finger-press seams open.

7. Make gussets on each bottom corner by bringing seam to the fold, right sides together. Because of the seams you have already sewn, they won't match up 100%, but very close. Stitch 1/4" seam across each corner.

8. Turn bag right-side out, and here is what you have. Almost done!

9. Folding along 1 marked line on bag front, stitch 1/8" from edge beginning at the top of the bag, and sewing just to the corner where the side and bottom meet. (An alternate suggestion would be to press on these lines prior to stitching them.)
 It can help to place a pin where you should stop, being careful not to sew directly on the pin.

10. Leaving your needle down, remove pin and raise your foot and pivot so you can continue sewing along the bottom of the bag (along the front/back, not a side where the seams are), to the next corner, then again folding on a marked line, back up to the bag top. Be sure and secure your stitching at beginning and end. (Note that when you are sewing along the bottom of the bag, there is no marking line, but the distance is so short, simply folding it is guide enough.) Repeat on the opposite side, and your bag is done!
Thanks to my friend Sharon/SharonBinWA (smbrendle on Ig), who tested my pattern and made the bag above on very short notice!

This unlined bag would also make a fine wine bottle bag when taking a hostess gift. Because heights of bottles differ, I'd suggest cutting your fabric about 6" longer than the height of your bottle or 20-22" if you don't have a particular bottle in mind. Other than your trim needing to be longer, all other dimensions and instructions would remain the same.

All fabric used in sample unlined bags is Moda Linen Mochi Dot by Momo (70% cotton/30% linen). Canvas or home dec would be other options. I source 3/4" chevron twill tape from FreshModernFabric, who has a nice variety of colors and will gladly cut continuous lengths. I've ordered some of the 5/8" Striped Edge Woven Cotton Trim also to have on hand as an option.

And for those of you who may not have access to the linen blends, or would rather use 100% quilting cottons and make a lined bag, I've tested that out for you too.
Here's what you'll need to do differently for the lined bag:
  • Cut 2 pieces of fabric, both 8"x21" - 1 for the exterior and 1 for the lining. Mark right side of outer fabric per step #1.
  • Follow steps #2 and #3 for both outer fabric and lining.
  • Follow step #4 as written, on the exterior only.
  • Ignore step #5 entirely.
  • Follow step #6 EXCEPT on one lining seam, leave a hole about 4" long, securing your stitches well on either side of it. 
  • Follow step #7 for both exterior fabric and lining.
  • Turn exterior fabric right-side out and nestle into lining which is wrong-side out. Line up raw edges of tops at side seams and pin. Pin a few more times as needed to keep top edges lined up. Stitched along entire top edge.
  • Pull entire bag through the hole you left in the side lining so entire bag is right-side out. Hand or machine-stitch the opening closed.
  • Nestle lining into bag, pushing corners into place. Press top edge nice and neat, and top-stitch closely to the edge along the entire perimeter.
  • Follow steps #9 and #10 as written. I found with the lining snug and neat in the bag, it was easily caught in this narrow stitching. 
So enjoy - whatever style you choose to make. Please post any finished bags in my Quilting with A Quilter's Table flickr group so we all can see!

Linking up with Fabric Tuesday.

Thursday, November 20, 2014

Pillow Fight!

Whenever I join  a swap like The Great Pillow Fight Holiday Edition, I can't help but be a little nervous. Even with clues, it's hard to know if what you come up with will suit your partner. For me, there's always alot of hemming and hawing, but eventually one just has to jump in and start making.

With a request for cherry reds, lime/chartreuse greens with pops of aqua or ice blue, here was my first stash pull.
Of course, once I came to a decision on the pattern, some of the prints had to go, and a holiday text and stripe were pulled in.
The pattern chosen, Ice/Fire Star by Sew What Sherlock? was a big (24") paper-pieced beauty, and I won't lie, it challenged me. Let's just say, my trusty seam ripper kept me company throughout, but the more I pieced, the more I liked it.
For quilting, I went with a simple grid using Aurifil 50wt #2021 (Natural White). I like the calm texture it gave the busy design.

For the back of pillow, I went out on a limb based on my partner's comment, "I love yetis." Honest truth, I had to ask daughter dear what a yeti was! And then when I discovered Betty The Yeti Patch Green by Robert Kaufman Flannel on Etsy, I couldn't resist using it for the back.
I hadn't sewn with much flannel, but I did know prewashing it was important. After a quick Instagram poll, I opted for an invisible zipper, and the tutorial by Sew Katie Did made it pretty matter of fact.

Wanting to add a fun little extra to my swap package, I couldn't resist a soft and silly yeti mug rug.
My partner, Whitney/whitney (the peacock tree) received my package today - yay! And I can breathe a sigh of relief that my part's done, while I wait to see what comes my way . . .

Linking up with Finish It Up Friday.

Wednesday, November 19, 2014

November Bee Blocks

Bee blocks this month started out with a bit of déjà vu. Elizabeth/occassionalpiece had the Mid-Century Modern make pineapple blocks. She went above and beyond by sending us the fabric cut to size plus the pattern printed on parchment, which I found delightful to sew on. Funny thing was Elizabeth and I were also in the Always Bee Learning bee together, and she has us make the same block there. So by now I'm a pro, right? Not. But it did go together pretty well.

For FAITH Circle this month, we have a partnership - Sharon/sharonhuismith is doing the quilt designing and Melissa/~Me1issa will be quilting the finished quilt. Sharon wrote a pattern for butterfly blocks, and asked for lots of color.

And finally, in more ways than one, were July Star blocks for Toni/HoosierToni for That Stash Bee. These were fun to do in Toni's chosen palette. Though I'll be watching as more That Stash Bee finishes show up in the group feed, these are my last blocks for the bee. It's been a fun 2 years with a great group of women, but time for a change.

So mission accomplished. Feels good.

Tuesday, November 18, 2014

Studio One :: Ironing Board Cover

The other day, hubby mentioned our ironing board cover was looking a little worse for wear. And I had the bright idea that I should make one rather than purchase one like I always had. Sounds easy enough right? I ordered 2 yards of a canvas weight fabric - GEO POP by emmie k for Robert Kaufman - and looked forward to a quick sew in a few days.

So Sunday night I figured I'd just 'whip it up'. After perusing Pinterest, I had settled on a tutorial by U-Handbag. I thought it was genius that she 'reused' the casing and cord! And you know, it probably is a really good idea. But unfortunately, my old cover didn't have a string that tied, but rather elastic without any excess to loosen up. So it was quite awkward measuring and cutting the casing away. And even though I measured as suggested, it didn't fit my new fabric well, and when all was said and done, it didn't fit my ironing board at all. I was bummed.

Luckily, there was enough fabric to try again, and this time I referred to a tutorial by 36th Avenue. {Since I'd already cut the casing off my old cover, I couldn't really use it as a pattern which would have been very logical. If you can do that, do.} 
Anyway, here's a rundown of what I actually did in case you want to do the same:
  1. Lay fabric on floor, right-side down. Set your ironing board upside down on fabric, 3" from a long edge.
  2. Measure and mark 3" around the entire board, though I narrowed that to 2" at the square end. With the iron rest my board has, there's not much room to tuck the cover down over the edge.
  3. Cut on the line you just marked.
  4. Press a rough 1/4" down around the entire perimeter, to the back side. Stitch down close to raw edge to make a hem.
  5. Now press 1/2" all around, folding the finished edge you just made toward the back to make a casing. Sew very close to your folded edge, leaving 3-4" at the square end, reinforcing your stitching as you begin and end.
  6. Thread 1/4" elastic through the casing, starting where you left an opening. I used a safety pin attached to one end of the elastic to make it easy to thread. It'll take some smoothing as you go, but it isn't too finicky. I failed to measure my elastic before I started, but I'd suggest starting with 5-6 yards to be safe.
  7. Once the elastic is threaded through, try the cover on your board! Pull elastic ends until the cover fits snugly, then tie the elastic in a double knot and trim a few inches away. 
Easy, right?! And it worked out ok! How fun will this be to press quilt blocks on? Very!
{Note that I left my original pad on the board before putting on the new cover. It's all snug enough that I think it'll be ok, 
but of course it would be better if I hadn't cut off that casing. You know. And yes, that is a power strip strapped to the leg of my board. 
Hubby put it there so I don't have to crawl behind the board every time I want to plug in the iron. 
Plus, it allows the cord to be more centered to the board, and adds some length.}

Linking up with Fabric Tuesday.

Monday, November 17, 2014

A Postcard Collection

Have I yet admitted my real passion for postcards? Well, I collect them! To the point that when we used to go on family vacations, we'd send one to the cat. Yes we would! And now that the kids are grown and the cat (miss you Blackie) is gone - well we send them to "Home Sweet Home". haha. It's true!
So when the thought of a postcard quilt came to me last summer, I just had to make it right up.

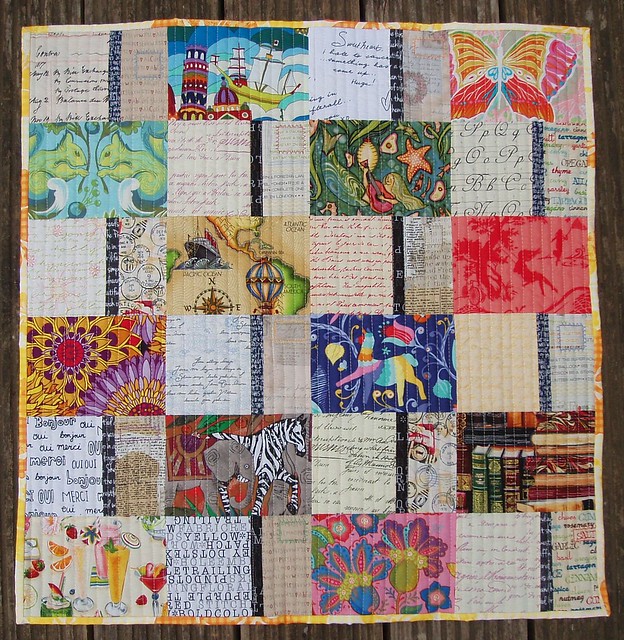
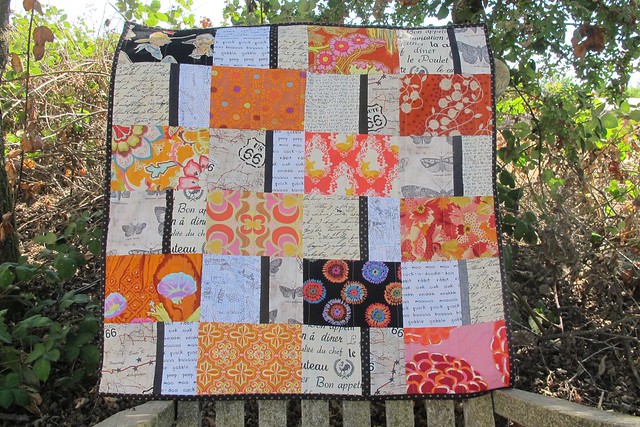
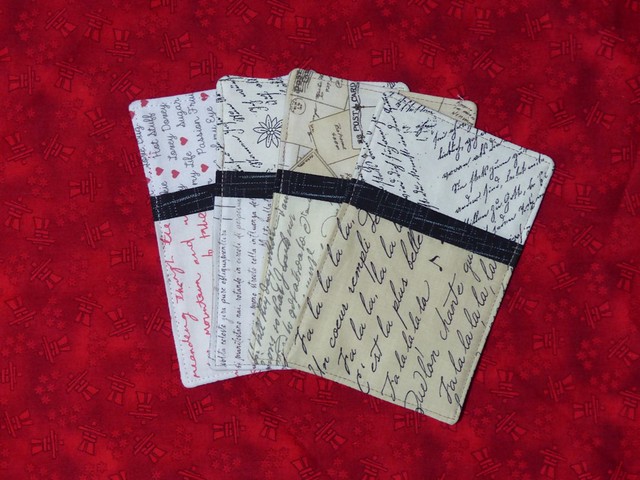
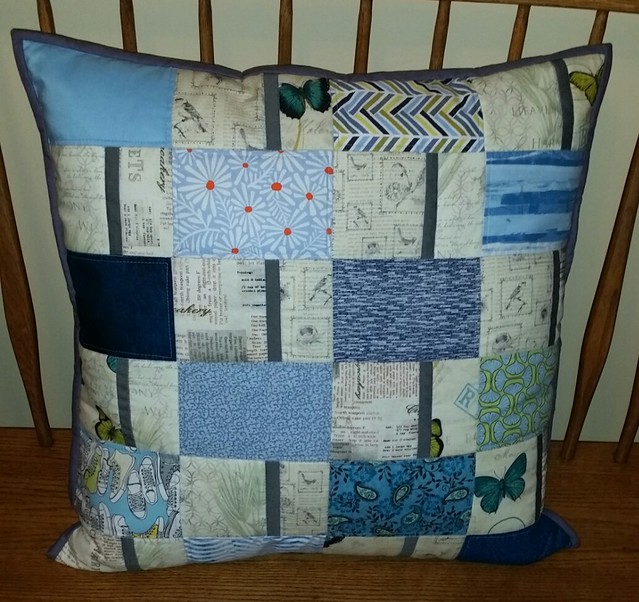
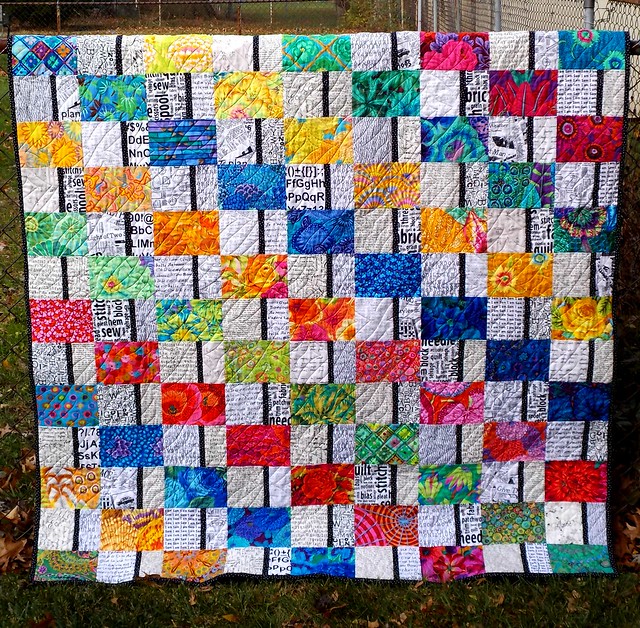
Then I made a quick and easy block tutorial {here}, shared it, and in response to the positive comments, started up The Postcard Quilt Along flickr group a few days later. Over 30 Postcard Block quilts and other projects are currently in some stage of completion, but today I'll show off all the completed ones so far! {Name/flickr name are below each photo. I've included links to blogposts when available.)


The Postcard Quilt Along
Katrin/makatrin


 Tiffany/t.anne


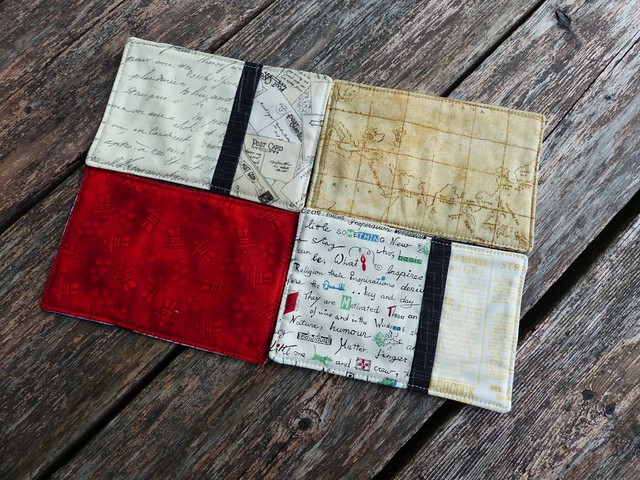
Postcard Coasters - Bundle 1

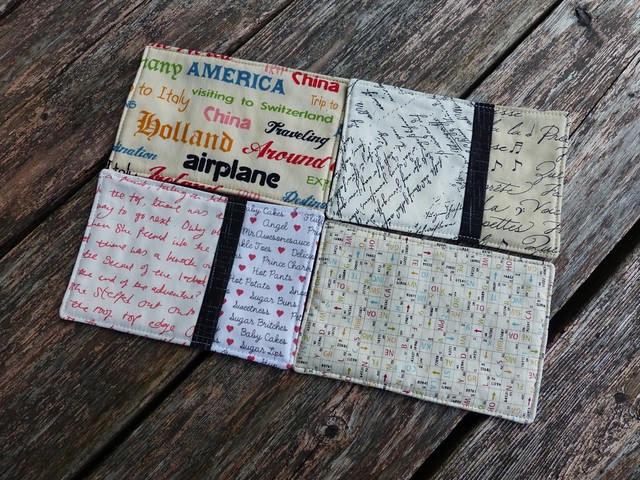
Postcard Coasters - Bundle 2

Postcard Coasters - Bundle 2


Letty/Lettyb; blogged


postcardquilt


Wow! Isn't that something?! I love how folks made it their own - with fabric choices, block placement, and other design details. Perfect! Thanks to everyone that joined in The Postcard Quilt Along! Feel free to keep adding your finished projects to the flickr group, and I'll share more another day.