Monday, February 28, 2022

Windows Aglow

"I’m asking my beemates to take a winter walk with me. Walks during winter evenings here are always in the dark. As we walk, we pass homes, apartments, condos and other buildings with their interior lights on. There’s a warm glow to the night. There are so many different window shapes out there that I thought we could have a little fun with this." Thus began M-R/@quiltmatters' prompt for Bee Sewcial this month.

Yeah, I'm kinda cutting it close on this month's blocks, but was happy to finally start pulling scraps for them. I had M-R's prompt on my mind when out driving over the weekend, and a unique window I saw inspired my first block. You can see the request was for 'scrappy, scrappy, scrappy,' and I was happy to oblige. But unfortunately, once the 11" x 16" block was done, I realized I had made the focal window oversized according to M-R's request, so I set the block aside and tried again.

For block two, I was thinking about those multi-use buildings where some lights are on at night, and others are off. This time I was able to keep the focal within the 4" requirement, and the finished block measured 11" x 12".


So back to the first block again to see what I could salvage. I unpicked a bit to remove the windows, then trimmed and re-pieced them to create something better-suited, size-wise. Then the fun of building out with a multitude of reds made all the recreating more than worth it. Now the block measured 11" x 15.5".

Other than my initial faux pas, I really enjoyed this prompt AND the palette. Now we get a month off, and then in April, I get to choose the prompt! Serious considering is underway!

Thursday, February 24, 2022

Scrappy Hourglass

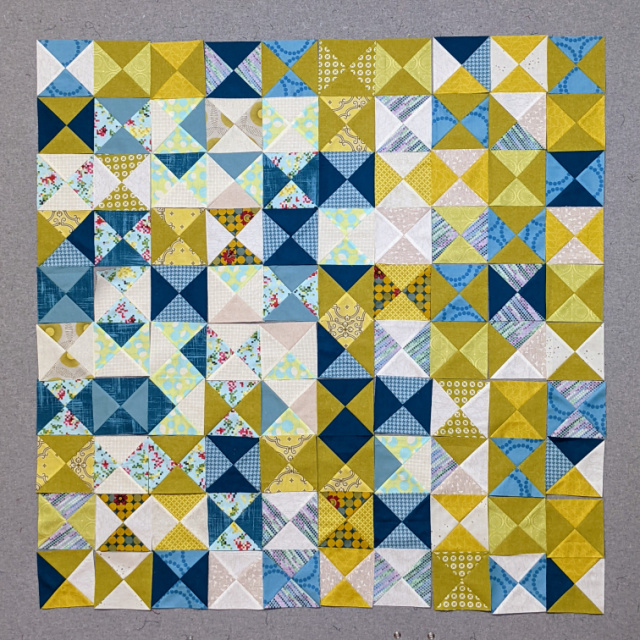
Early in the month, in an attempt to keep working through my scrap basket, I started making some hourglass blocks. I had a vague idea of creating something similar but different than "Timer", made late last year.


I really love the palette of this new piece! I could have gone on and on...


But things changed after I made a whole bunch of blocks - about 100. I was kind of out of larger pieces of the key fabrics and just felt like I needed to go another route. That, and if pieced in the orientation below, the quilt would have been about 45" square, and I was hoping for a little larger.


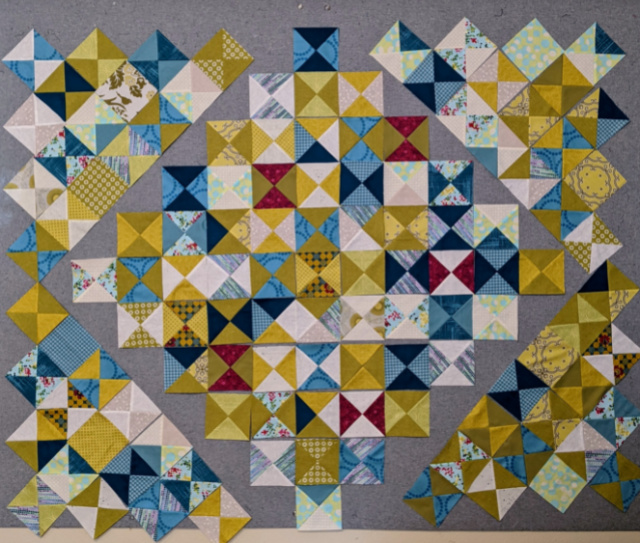
After staring at my design wall for days, I started rearranging blocks, and finally settled on a rough plan, with blocks straight but also on a diagonal. Can you see my rough design?


AND I added in another color - berry. The print I used has two shades, and I expect to add some solids in a future step. 

I've begun piecing the 'center' square of blocks, and then will have to figure out what's next. But at least I have the beginnings of a plan, and I'm thankful for that!

Monday, February 21, 2022

School's Out

Well about 8 weeks after the Schoolhouse Sampler stitch-along began, with very nearly daily stitching, my Schoolhouse Sampler is complete! The sampler was created by, and the stitch-along hosted by, Rebecca Ringquist of Dropcloth Samplers. The month of January was really inspiring, with a daily video from Rebecca, either showing us how to do a certain embroidery stitch or giving us ideas on what stitches might be good where as we stitched our samplers. Of course, even though the sampler came preprinted, it was totally up to us to make it our own with our own choices of threads, colors, and stitches. 

Early on, I took Rebecca's suggestion to stitch with a double-thickness of perle cotton #8. It definitely makes more of a statement than single-thickness, and with the variegated threads, it adds to the color-play.

We began with the rows and boxes on the left-side of the sampler. I chose a pretty loose color palette, selecting colors as I went. You can see there are just a couple of areas where I used wool yarn for the couching stitch - the reddish along the top, in the couching stitch section.


I was, at the same time, excited about and dreading all the alphabets, of which there were three. With the largest set, I really let it go, using all sorts of stitch patterns and colors. Some of my favorites are the 'P,' done entirely in French knots; the 'V', my first try using a running stitch to fill in a letter; and the 'N', in a variegated new-to-me brick stitch.


I left my name and the date for nearly the last. And you can see, because I forgot to remove the marking before taking photos, but I drew my name on before stitching. I actually printed a signature very similar to my own, and traced it on. I spruced the 'D' up a bit by couching it with two different thread, and I'm really happy how it turned out. Oh, and I tried a new stitch! That variegated gold-green all around my name and the year is done in a 'heavy chain stitch.' You can see the difference between it and a regular chain stitch in the photo below, where they are side by side.


Traditionally, samplers often included the birthdays of the maker, and though I chose not to do that, I did add some significance using different colors of thread to outline and stitch the 1, 9, 5, & 6. (Scroll up just a bit and you'll see.)

Also, I chose to highlight certain letters in the alphabet above using the coral thread - and with those letters, you could spell my first and last names, just for fun.

Lastly, and truly it was a last-minute design decision, I filled in around the largest alphabet just a bit with tiny 'cross' stitches. Not sure they'd officially count as embroidery, but  maybe?


So Schoolhouse Sampler was definitely one of my favorites among alllll the Dropcloth Samplers I have stitched in the last couple of years. Honestly, I'm going to miss stitching on it! 

Tuesday, February 15, 2022

Yarrow Wristlet

Well, it seems I have an inconsistent track record with sew-alongs so far this year. Either I finish them too quickly, or I wait until they're over and speed-sew to catch up. So anyway, over the weekend, I sewed right through the Yarrow Sew-Along and now have a new wristlet to show for it.

The latest of Anna Graham/Noodlehead's patterns, the Yarrow has a zipper going around a curve, and I had never done that! Come to find out, it wasn't the trickiest part of the pouch construction!
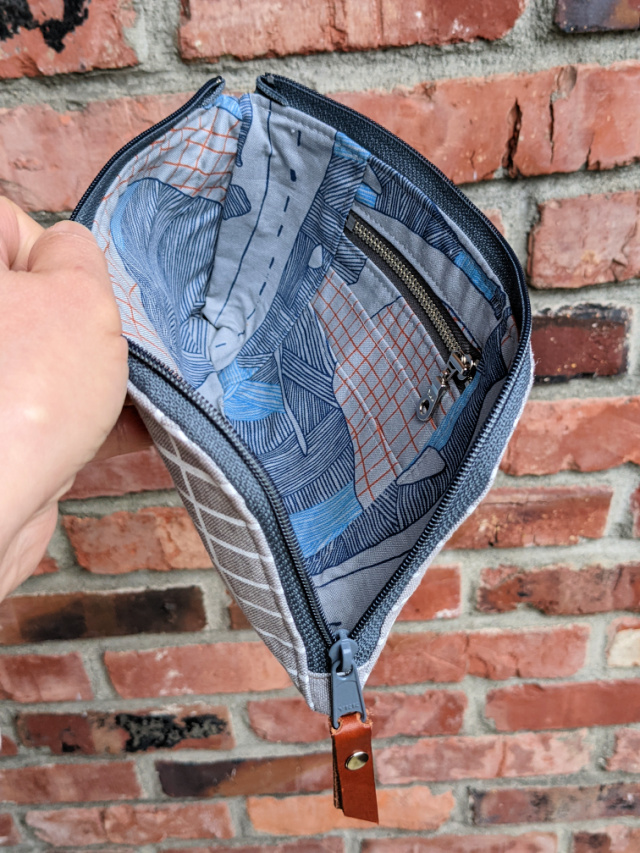
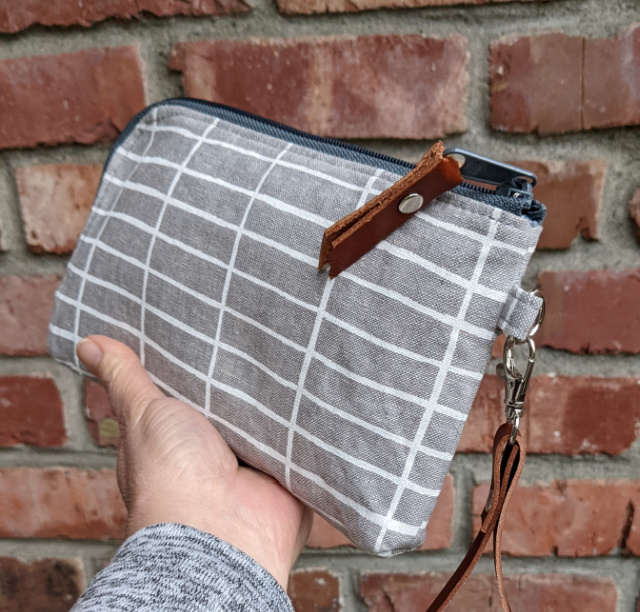
Let's back up just a bit.... I did need to purchase the zippers - a 12" x 1.25" handbag zipper + a 4" zipper - neither of which I had in my stash. Those, and the ½”-wide d-ring AND ½”-wide swivel snap. Otherwise, I had everything I needed. For fabric, I chose Essex Balboa from Erin Dollar for the exterior, and for the interior, a favorite Carolyn Friedlander print from her Carkai collection.


So the most difficult portion of this pouch for me? That front exterior pocket. So weird. I tried it twice with blue waxed cotton - I had high hopes, but I just didn't like it once I'd sewn it on - twice. So I switched to the leather, and the first time, I just wasn't happy with my top-stitching. Fourth time was a charm, though it got marred by the finish - I'm thinking that must have happened as I was turning it right-sized out. Disappointed, but I bet it will distress some more with use.

As for that curved zipper? Went in flawlessly, which was very satisfying. And those rivets also went in quite easily, considering hardware always makes me a little nervous.

When finished, the wristlet measures 8 ¾” wide, 1” deep, 5” tall, and with that interior zip, card pockets, and room to hold a cell phone, I'm wondering if I can't just use this as my spring/summer bag.

Anyway, it has alot of nice details, always a feature of Anna's bags, and it was definitely an enjoyable sew. Better late than never, right?

Monday, February 14, 2022

The Heart Block

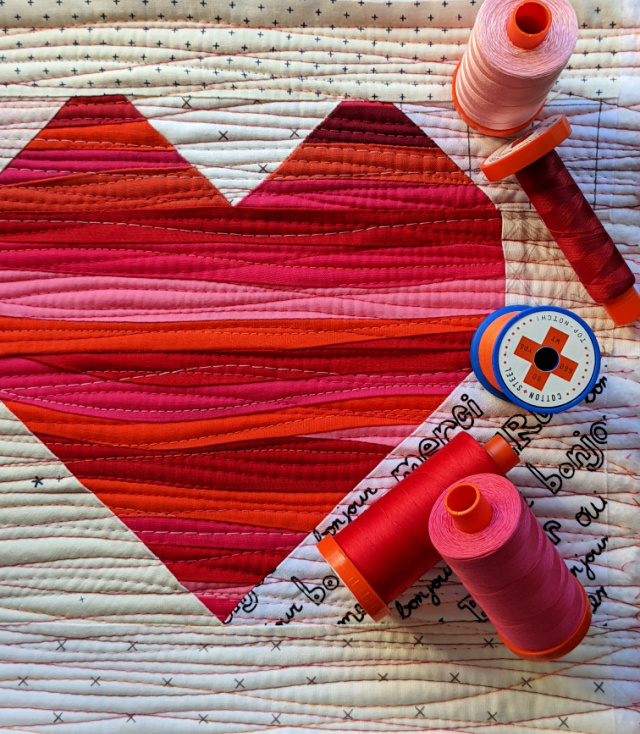
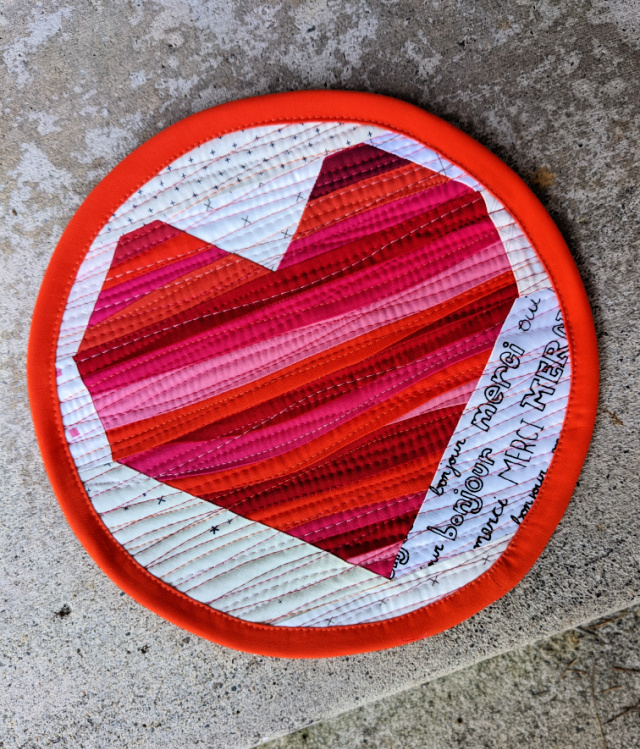
A week ago, my friend Louise/@imfeelincrafty was texting me photos as she created her scrappy little heart blocks, and at some point, just sent me the pattern to try. I jumped right on it, pulling scraps and starting in on paper-piecing. It's such fun working on a little project like this, and when it's scrappy, even better!

I had actually printed the pattern one night and began piecing the next morning, and somehow in that span, I guess I forgot that not only was Louise's heart strip-pieced, but so was the background - duh! Which is why the background for my heart block is pieced with chunks of fabric, rather than strips. Still scraps but not quite the same. Not to say I don't like it!!

Once the block was done, it came to me it would be a fun potholder! So I layered with batt and insul-bright, and rummaged for a variety of threads.

I did some dense organic straight-line quilting (so fun!), cut it into a circle, and bound it in orange so it didn't seem toooo seasonal. Then I sent it right off to Louise to use and enjoy. Perfect, amiright?


Click here for Louise's free pattern, in case you'd like to make your own scrappy heart block

Wednesday, February 9, 2022

Chickenscratch Quilt

Well, my chickenscratch quilt may just be the most unique quilt I've ever made. The blocks were begun back in January 2021, completely hand-stitched with white perle cotton #8 and a handful of (mostly) variegated Aurifil cotton floss. The project itself was the brainchild of Blair Stocker, and she led us through a year-long block-of-the-month called the Snowflake Sampler, snowflake embroidery being one of the many names for this kind of vintage embroidery.

By definition, Chicken scratch embroidery (also known as Broderie Suisse, Australian Cross Stitch, and Depression Lace) is a variation of cross stitch that is traditionally stitched on gingham fabric using perle mercerized cotton thread or stranded embroidery thread. The gingham squares act as stitching guides and help to form a lacy pattern. [source: Quilting Daily]

For my version, I used 1/4" grey Carolina Gingham by Robert Kaufman, and there were three finished block sizes - 10" squares, 10" x 20" rectangles, and 20" squares. Where some folks in the BOM had issues with not really being able to match those gingham squares when piecing the blocks into a top, I thought the mismatched gingham seams added to its charm and reflected the time-period where this kind of stitching was done. In short, I just went with it.

When it came to a quilting plan for this kind of quilt, I really wondered about it for a while, as I knew I didn't want to quilt over my hand-stitched designs. It was Yvonne/@quiltingjetgirl who first gave me the idea to tie it, and right away, I loved that idea.

That process still took some figuring out. First, I clamped my pieced quilt back to my dining table, added a layer of Quilters Dream Cotton Request batting, then the quilt top of course, and pin-basted it everywhere I intended to place a tie. I had initially thought I would pin and tie evenly every 6", but decided that really did conflict too much with my stitching. Considering the batting recommended a maximum of 8" between quilting, I used that as a guide instead, pinning along seamlines, then uniquely in each block to stabilize but not interfere. 136 pins later, I was ready to tie!

The fun thing about Yvonne's idea to tie the quilt was that she suggested tying so the knots were on the back. That's the part that really sold me. But that did indeed mean that I needed to begin each knot on the back! I used my 12" wooden hoop to secure one area at a time. Then I basically pushed my needle in using a safety pin for placement guidance, removed the pin, and completed the stitch, going through the quilt sandwich twice, then typing a square knot, securing tightly. Once all the ties - all made with size 8 perle cotton - were done, I trimmed their tails to 1/2" long.


The quilt finished at 60" square, bound with more grey gingham. So loosely 'quilted', and with the lightweight batting and hand of the gingham itself, I ended up with a super comfy cozy quilt. Loosely quilted quilts are not my norm, so I'm wondering if I should add more ties. Then again, it's unique in every other way, so why not?  


And yeah, nothing about this project has photographed well. The stitching is colorful and beautiful, and despite all the wrinkled-looking photos, it is really sweet and lovely in person. Let's just say I'm glad I took the time to explore chickenscratch, and though I couldn't quite imagine a quilt made from my blocks, I'm glad I saw it to a finish just to see how it would turn out. Definitely worth the year of handwork!

Friday, February 4, 2022

Lineplay

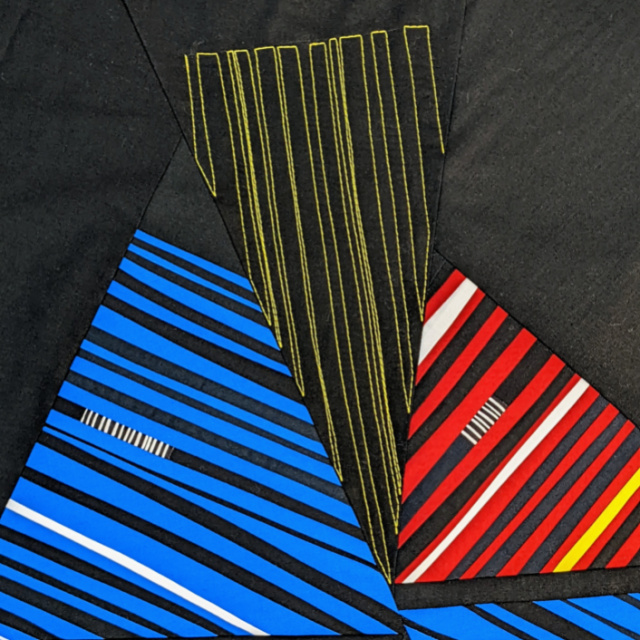
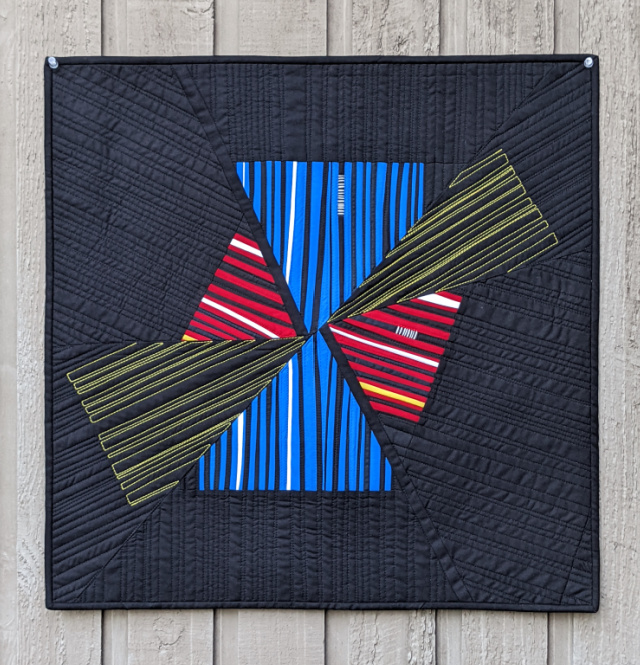
So when I left off sharing about the progress on my current Quilt Improv Studio challenge project, I had four triangle-ish segments of improv lines, and honestly, I could have just left it as it was. I liked the imbalance and the tiniest bit of yellow in my primary + black & white palette. But I had other plans, and I felt compelled to see them though.

I had ordered some 28wt yellow thread [Aurifil #2120 Canary] and set out to create two "ghost-blocks," if you will.... segments that echoed the feel of the improv lines in the red and blue slabs, but in thread rather than fabric. Honestly, I love how it turned out!


Then, of course, I needed to quilt the rest of the design. I chose Aurifil 50wt in black [#2692] and in the red and blue sections, stitched from the edge up into the black lines and back out. In the yellow sections, I again echoed those lines but just until they met. (Sorry, forgot to take a photo.)


Once the planned quilting was complete, there was just a slight problem, and that was that just a few of the blue 'lines' bubbled up in the center more than I would have liked. So with happily matching thread, I quilted just a few of the red and blue lines in each section. Minor, but it helped the problem, and added a little extra interest.


At just over 24" square, "Lineplay" barely fits the minimum dimensions for the challenge, but it works! I'm happy that though it started with a couple of purely improvisational striped slabs, I find the resulting shapes very intriguing. And the ghost 'blocks' were fun to execute - one of the few times I've used 28wt thread. I definitely want to use it more. And last but not least, this piece was constructed mostly of scraps, which made me verrry happy.

Wednesday, February 2, 2022

January Fabric Usage

Hope you don't mind, but I'm still keeping track of my fabric usage this year. When I think that over the last two years I used up a net of -173 yards (!!), I want to keep myself accountable and heading in that negative direction. I can really tell when I look at my stash that I've made progress. Where I used to have a cubby for each color of prints, some of the colors are now combined into one cubby. My solids all fit in three cubbies - one for warm, one for cool, and one for neutrals. Eventually I'd like to expand those out, but am not really wanting to add to stash quite yet, so for now, I'll purchase solids more as I need them, and continue using up the print stash. Not that I want to totally eliminate prints from my stash, but I'd like to focus on prints I really love, and more usable-sized cuts. My days of randomly collecting fat-quarters is pretty much over.

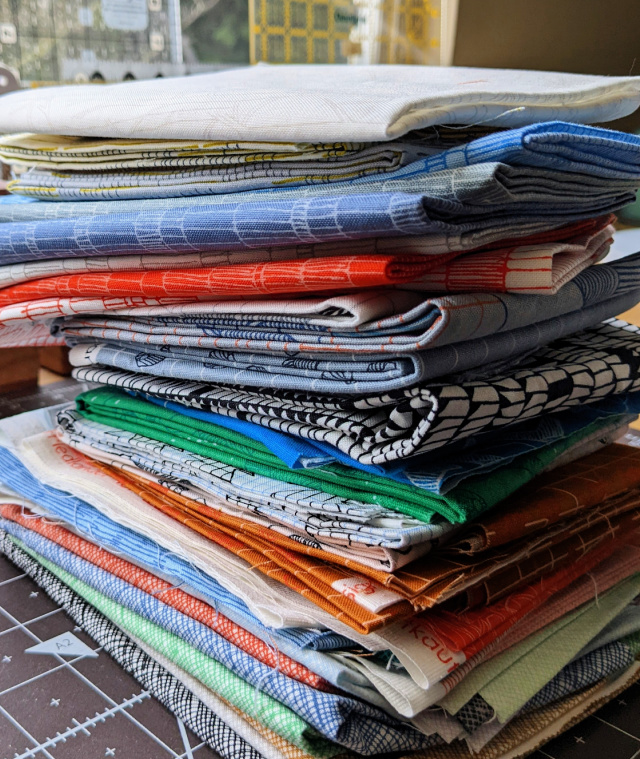
That said, I was offered a beautiful stack of Carolyn Friedlander prints from a friend that was doing her own destashing. Considering they fell into the 'really love' category, how could I say no? Yes, they are fat-quarters and fat-eighths, but I seem to use those well in CF fabrics, so I'm feeling ok about that.

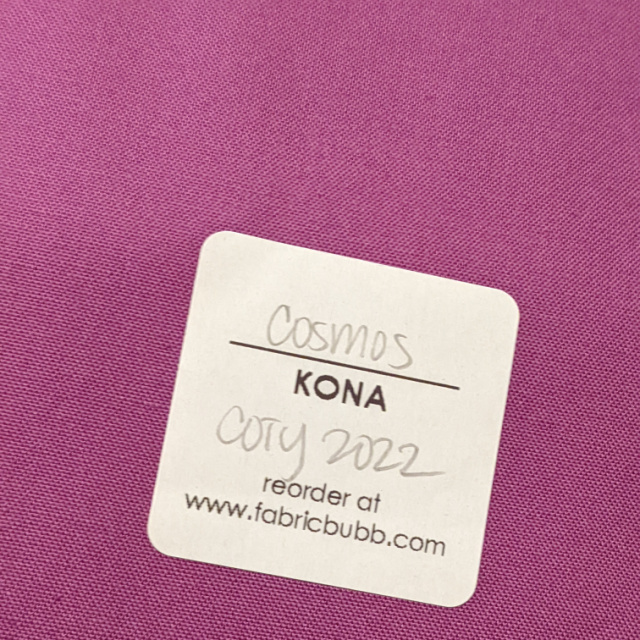
I also did purchase 2 yards of Cosmos, the Kona Color of the Year. It's tradition, and I know I'll use that in no time.

SO, as far as using up fabric, I finished up one quilttotally made another, and made the backing for yet another! Plus I made bee blocks and a handful of Christmas giftbags. Though it feels like sewing opps have been limited, I guess progress hasn't been that bad. Here are my totals for the month:

January Fabric Usage
Used up: 13.375 yards
Brought in: 10.5 yards 
Net: -2.875 yards
Year to date: -2.875 yards

So progress, at least. I'll keep working on it!