Showing posts with label pillow. Show all posts

Tuesday, December 23, 2025

Twinkling Triangles Pillow

After giving you an update on the making of all my Twinkling Triangle blocks, I kind of left you hanging, unless you saw the reveal on IG. The mystery design behind all the paper-pieced blocks was a modern tree!

I got the tree pieced, but then life intervened, and it took me a few days to continue on in my effort to make a holiday pillow cover. 

Once I'd used more background fabric to make the tree section more square-ish, I added mitered borders in two of the fabrics used in some of the blocks - Kona Glacier and RJR Fabrics' Skinny Stripe in Grove. 


Then on to quilting! Quick and fun was the requirement here, so I went for a vertical serpentine stitch, reminiscent of tinsel. I used Aurifil 50wt 5006 [Light Turquoise], which was pretty yet subtle over the tree, the background, and the borders. I went with a simple lapped backing because time was of the essence.


Putting my 24" cover on a 26" pillow form made it plenty puffy, so much that you can hardly see the borders in the photos. Let me just say, 24" is a big pillow! Below is the new Twinkling Triangles pillow with the 12" x 18" candle pillow cover I made earlier this month. 


Anyway, the Twinkling Triangles mystery sew along with Melanie @mellmeyer was an enjoyable addition to the season, that's for sure.

Friday, December 12, 2025

The Candle Saga

Brace yourselves, as this is a bit of a saga....

In past years, I've made sets of Dropcloth @dropcloth ornaments that I really liked - the hearts and the snowflakes. But I've also stitched some that were stitched but never got made into ornaments - the gingerbread houses, as they admittedly are a little fiddly, at least for me. So this year, since I did like the candles, I wanted to stitch them, but I also decided right off to keep them together. Maybe I'd frame them? I wasn't sure.

Fast forward..... 

And I had a product I was definitely not happy with. Oh the embroidery was just fine, nice even. But for some reason, I'd gotten some serious puckering and I'm not really sure why. I blamed it on a faulty hoop, which I've since disposed of. Whatever, I wasn't going to keep the candles together after all.

After trying to minimize that puckering with first, hand-quilting, which I then removed; and then machine-quilting, which I also took out.... I decided they were destined to be ornaments after all. Except I struggled with that too. I cut them apart, sewed each candle onto backing, but couldn't turn them right-side out! I think they were just too think, with my extremely dense quilting. So.... I removed them all from their backings! I pressed them, and tried to glue the seam allowances to the candle backs, thinking I'd hand applique them all to a background fabric. I only got half-way through the first candle when I decided that wasn't very enjoyable at all with the thickness of the candles. 


SO I switched over to machine-applique with monofilament thread on top, and a 50wt dark blue in the bobbin. Worked like a charm!

Just add a little side fabric, a lapped backing, and before I knew it I had a holiday pillow! 

The background was made from Essex Speckle Yarn Dyed in Ocean, and the backing in Kona Windsor. Finally, I have a finish I'm really happy with. Whew!


P.S. The candles were stitched with perle #8 from Wonderfil, with accents using Cosmo metallic threads.

Wednesday, November 27, 2024

Block Studies Collective | Log Cabin

November was my second month participating in Tara Faughnan's @tarafaughnan Block Studies Collective, and I was pretty pleased we'd be focusing on the log cabin block. Except the focus was on a unique shape, actually a courthouse steps variation, and the construction was done with a new-to-me technique for foundation paper-piecing.


To be honest, Tara provided numerous templates for us to try, but this 5" x 10" finished rectangle was my favorite, so I just focused on it. 


After making the first block, I made the second with an eye on the first, knowing I'd use them together, and I wanted them similar yet different. Once paired up, I bordered them with the darkest solid in the palette, Kona Everglade.

I wanted to make a finished project with this piece, and in a perfect world, I would have stretched it on a frame. But instead, I decided to quilt the border with coordinating thread and make a pillow.

The end result is stuffed plump with that pillow form, so you can barely see the quilted border. OH well! It makes me happy, just the same.

Monday, December 13, 2021

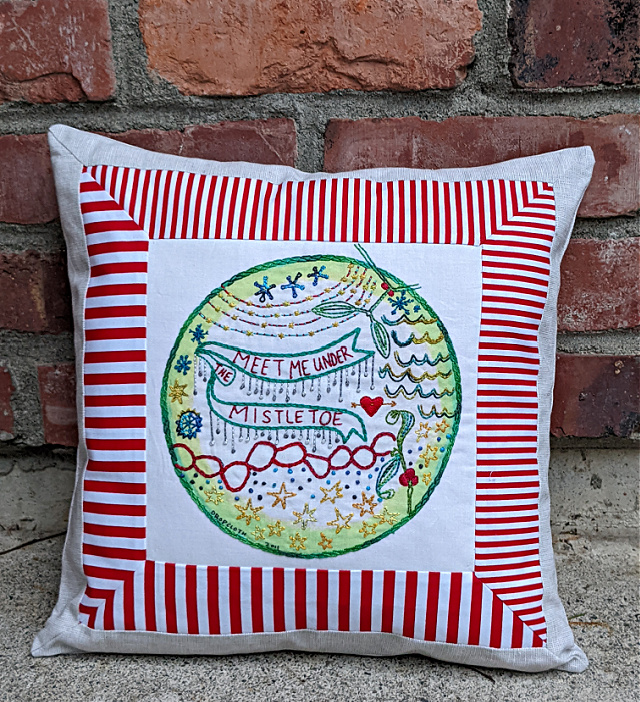
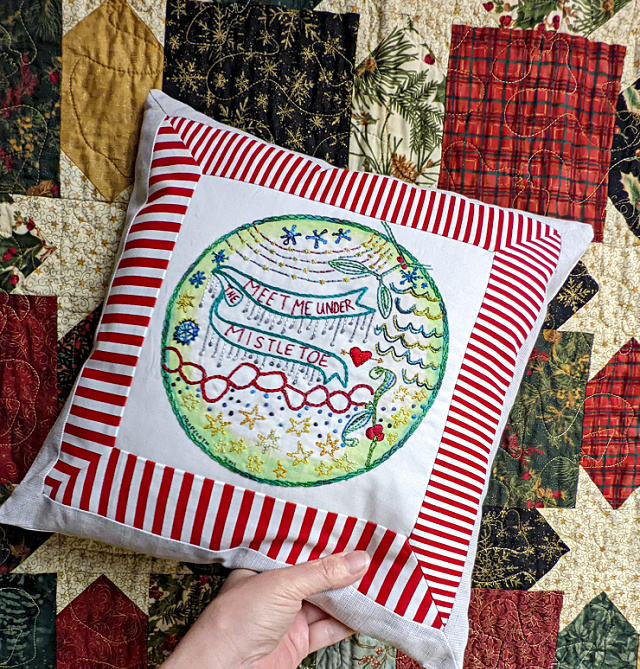
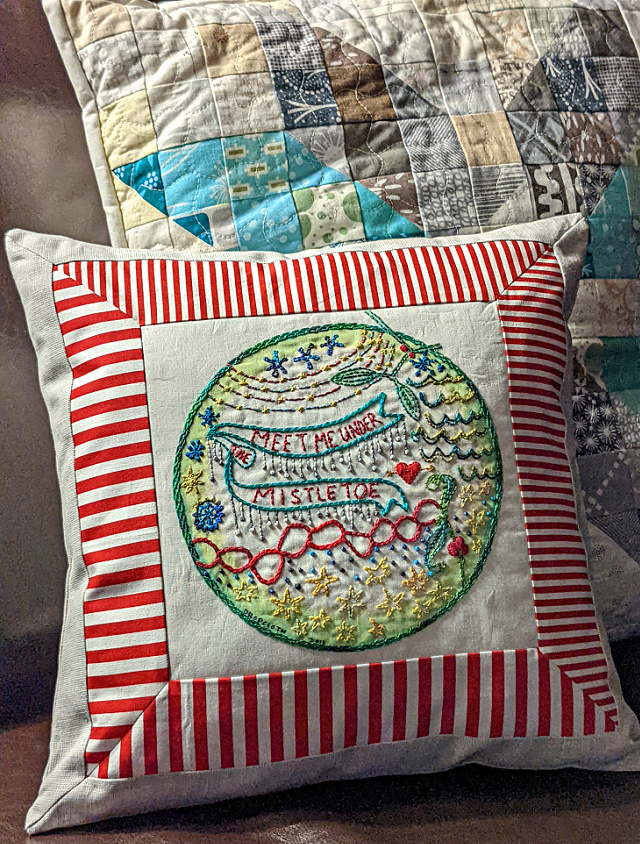
Mitered Mistletoe

Last week I shared my latest Dropcloth sampler, Mistletoe, and I actually made it into something that can be enjoyed this season!


I appreciated all your ideas of what I could make with the stitched sampler, but I confess I was feeling the pressure, and something relatively simple seemed ideal. I went looking in my stash closet, and not only did I find a pillow form I didn't remember having (serendity!), but the red and white striped fabrics called me name; and indeed, a pillow seemed doable.


I was debating whether to use the wider stripes - Michael Miller's Clown Stripe - or the skinny Riley Blake's Stripes and settled on both! I also used some Essex Silver for the outside border and the back of the pillow, which tied in with the silver threads 'dripping' from the banner on the pillow. Mitered corners seemed a special touch, especially on the corners where the different sizes met!

The pillow finished at 14" square, and is a cheerful addition to our Christmas decor in the living room. 

Tuesday, March 10, 2020

Round and Round

So when I last shared my Improv Rings project, I was still adding rings, but I had run out of scraps in my colorway, and was cutting into stash. Which wasn't really a problem, but I didn't want the project to grow too big. I was having so much fun with it, I wanted to move on to the quilting, finish it up, and see what was next.


After posting my progress, folks responded to my request for layout suggestions, and in doing so, some suggested projects other that a quilt.


I'm not sure anyone actually suggested making a pillow out of it, but once that came to mind, nothing was stopping me. Not just any pillow mind you, but a round pillow. Come to find out, round pillow forms aren't as easy to find, but I managed, purchasing a 22" round - 2" larger than I planned to cut my 'quilt top.'


So back to the quilting.... I basically made a small quilt, batt and backing and all. I followed the rings round and round with Aurifil 50wt #2975 [Brass]. Not sure why that color felt 'right' but I really like the effect and the mild contrast.


Ok, so what came next wasn't pretty, and I'm not showing it here. I went to press the finished top, and my iron spat on it, unfortunately. I went ahead and stay-stitched around the edges and threw it in the wash. Thankfully the icky spots disappeared and I moved ahead. But that's why the finished pillow front looks all crinkled.


I decided to make the back kind of fun, using both a contrasting metal zip and zipper ends. I realized after the fact that using a zipper that much shorter than the pillow back would make it tight to stuff that pillow form in. It worked, but I'm a little confused at the rippling around the edge, since the pillow is definitely 'full.' But I'm hoping use will improve that, and besides, the overall effect is so darn pretty, I can overlook it.


When all is said and done, it was fun to make a pillow for a change. And try a new technique using a bunch of scraps. Now to decide what's next.

Friday, March 9, 2018

Repeat

I'd done it once (twice even!) and there's a decent chance I'll do it again. But this week I gifted the third pillow I've made using the Christmas Snowflake block by Rachel/Wooden Spoon. As far as I'm concerned, an eight-pointed star is good any time of the year, and it was definitely fun to rummage through scraps again to create this latest version.


I made a near-duplicate of a previous one, simply because my friend said she liked it so much. Just like before, I quilted a wavy stitch down each row using Aurifil #2021 (Natural White), did a flap-closure for the back, and stuffed it with a poofy 20" pillow form. Fun stuff!

Linking up with Finish It Up Friday!

Monday, December 19, 2016

Another Angle

Instead of our regular December meeting, the Seattle MQG has traditionally had a full-on holiday party/sew-in, and part of that tradition has been a swap. Like last year, I made a holiday pillow, and chose Another Angle, which I sewed up with Cotton and Steel Washi Tape as the accent fabric, mixed with holiday solids and Essex linen.


I quilted it in a large-scale grid, and at 20", it was a good-sized pillow, which ultimately found a home with my friend Michelle/@michellemakesmischief.


In return, I snagged a lovely little quilt made by Pam/@pamjcole, and I love the minimalism and match-stick quilting. And those stripes in the binding. It came with the bonus of a tiny magnet and equally tiny scissors, which I hear she got at snuggly monkey. Sweet.


It was a fun day visiting with my guild-mates, I got next to nothing accomplished, and I had some mighty yummy cookies, which I'll tell you about tomorrow!

#Christmascushionalong #seattlemqgswap

Monday, September 26, 2016

Mad Dash

So I did a little more pattern-testing last week, this time for Michelle/Factotum of Arts [ml_wilkie]. The pattern is for Mad Dash, a subtle geometric quilt (see #maddashquilt). With four size variations available, I opted for the 20" pillow. Though I loved how Michelle used a mix of low-volume prints for her original Mad Dash quilt, I chose just one - a favorite I've had stashed for a while - Make Drafts Paper by AGF Studio. For the 'dashes' I used an Interweave Chambray in Pepper.


The piecing went really quick, and for quilting, I did an uneven grid in two directions.


I backed the pillow with more of the chambray, and I kinda love that deep contrast.


And one little side note .... my backing fabric wasn't quite wide enough, so I pieced it! Rather than let it seem a mistake of sorts, I top-stitched on both sides of the seam, making it appear as a design detail. It made me happy at least. 


So it shouldn't be long before Michelle releases her latest pattern. I went pretty simple with my choices this time, but the pattern has lots of flexability. Peek here at what jskarritt is doing with hers!

Saturday, December 12, 2015

A Christmas House

It's always a bit of a dilema when it's time to make something for a swap. So I followed the guidelines of 'make something you'd like to receive' as well as "make something that you'll enjoy making." And I hit it on both counts. Plus I got to use a pattern I've been wanting to try - Carolyn Friedlander's "Austin House," which I nabbed at QuiltCon. Happily, the block went together so smoothly, and even though I love how it looks in Carolyn's own fabric, I couldn't resist trying a scrappy Christmas look.


Having made just one block, my project was destined to remain relatively small. Surrounded by more background fabric (a gray chambray), I was aiming for a 12" x 24" pillow insert. For quilting, I tried another something I've been wanting to try - a diamond crosshatch, with lines about 3/8" apart. What fine texture it creates.


This time around, after the quilting I trimmed both front and back to the same dimensions as the insert, after having used this lapped zipper tutorial by Pile O'Fabric, which worked perfectly. Then I sewed the front and back together with a 1/2" seam, turned it all right-side out, and voila! It filled the pillow out quite nicely, so remind me to do that next time, would you?


[Random note: after finishing the pillow, I happened upon made by ChrissieD's Quilted Pillow Cushion with Hidden Zipper, which has a zipper installation that's very very similar, except with 1/4" double-stick fusible tape....a clever idea I'd like to try.]


So the pillow got taken to the #SeattleMQG holiday party today, was swapped twice, and then happily claimed by my bee-mate Aline/augustdreamsquilts. Good times.

Thursday, November 20, 2014

Pillow Fight!

Whenever I join  a swap like The Great Pillow Fight Holiday Edition, I can't help but be a little nervous. Even with clues, it's hard to know if what you come up with will suit your partner. For me, there's always alot of hemming and hawing, but eventually one just has to jump in and start making.

With a request for cherry reds, lime/chartreuse greens with pops of aqua or ice blue, here was my first stash pull.
Of course, once I came to a decision on the pattern, some of the prints had to go, and a holiday text and stripe were pulled in.
The pattern chosen, Ice/Fire Star by Sew What Sherlock? was a big (24") paper-pieced beauty, and I won't lie, it challenged me. Let's just say, my trusty seam ripper kept me company throughout, but the more I pieced, the more I liked it.
For quilting, I went with a simple grid using Aurifil 50wt #2021 (Natural White). I like the calm texture it gave the busy design.

For the back of pillow, I went out on a limb based on my partner's comment, "I love yetis." Honest truth, I had to ask daughter dear what a yeti was! And then when I discovered Betty The Yeti Patch Green by Robert Kaufman Flannel on Etsy, I couldn't resist using it for the back.
I hadn't sewn with much flannel, but I did know prewashing it was important. After a quick Instagram poll, I opted for an invisible zipper, and the tutorial by Sew Katie Did made it pretty matter of fact.

Wanting to add a fun little extra to my swap package, I couldn't resist a soft and silly yeti mug rug.
My partner, Whitney/whitney (the peacock tree) received my package today - yay! And I can breathe a sigh of relief that my part's done, while I wait to see what comes my way . . .

Linking up with Finish It Up Friday.

Monday, June 16, 2014

Nested Churn Dash

One of my favorite traditional blocks is the churn dash, and though it is on my bucket list to make a full-size quilt someday, I stopped at one block as part of the Nested Churn Dash sew along with quilt jane.
You may remember I made my own version of a triple churn dash last year. After all that craziness, I chose to make this one a little more traditional, with much more contrast in value. All the fabrics in the top other than the solid gray are from Alison Glass - a mix from her Sunprint and new Field Day collections.
I was indecisive about quilting. In fact, I started and removed stitching twice before settling on what some call a serpentine stitch - on my machine it's a specialty "tape-attaching" stitch stretched as long and wide as it could go. Using Aurifil 50wt #2600 (light gray), the quilting tied all the components together in a subtle way while adding some welcome texture.
Another decision in question was whether to make this block into a mini quilt or a pillow! In fact ... I had backed it with the last piece of my favorite teal feathers before I started quilting, basically intending on going with the mini quilt option. But after both a dear friend and mom voted emphatically pillow! ... I went ahead and went that way instead.
Since I had recently purchased a stash of regular zippers, I chose to do a lapped zipper and a bound edge to finish.
At 24", the finished pillow is the largest I've made and it'll definitely will be a fun focal point in our living room . . .

Linking up with Fabric Tuesday.

Wednesday, June 11, 2014

Crazy 'Gator

At the Seattle Modern Quilt Guild, we have "Sew & Tell" at the end of every meeting. I am always inspired by the work of my guild-mates! One night, as my friend Louise/I'm Feelin' Crafty, sat down next to me, I saw she'd brought something to share. She caught me a little off-guard when she told me, "I brought my 'gator quilt." This girl's a master at paper-piecing and had created a pattern for the cutest 'gator ever!!
Well, I am not as comfortable with paper piecing as Louise, but I couldn't resist when she called out for testers for her new pattern!! I agreed to do 1 'gator (there are 3 sizes included in the pattern), and got right to work!
I happened to have a big piece of crazy-pieced greens left over from a previous crazy-piecing frenzy, and thought it would be perfect for my 'gator. I made the small gator, which measures 9"x21". You can see there are some tiny pieces, but that's one area paper-piecing really shines. I can't say I had any trouble piecing this guy at all. Louise has him split up into several sections that went together just great. The pattern was easy to follow - though basic paper-piecing skills are assumed - and before long I had a full 'gator!
Since I was making just 1 'gator, I thought he would be perfect for an oblong pillow. I quilted the blue background to give the feel of water and really had alot of fun with that. I used Sew Katie Did's invisible zipper tutorial, which worked like a charm. It had been years since I had inserted one, so I was pleased how easy it was. Just fyi, I used a 20-22" invisible zipper, and my pillow form was 12"x30".
So the 'Gator Blog Hop is just starting! Be sure and see Louise's Release Party post, and check back in over the next 10 days to see all the other 'gators!
BlogHopButton
June 13th- Marci Girl Designs
June 14th- I'm Feelin' Crafty- showing off other Testers work!
June 16th- Wombat Quilts
June 17th- Wips and Tuts
June 18th- Shaffer Sisters
June 19th- Crafty Shenanigans
June 20th- I'm Feelin' Crafty

The 'Gator Quilt pattern is available on Craftsy! I know you'll have as much fun with it as I did! And isn't Louise's full 'gator quilt great?!

Linking up with SEWjo Saturday.