We used black and white prints with a white solid, so the instructions are written accordingly. Obviously, you can change things up according to your preferences, including fabric choices and number of rounds, even block size. But this will get you going on the basic block.
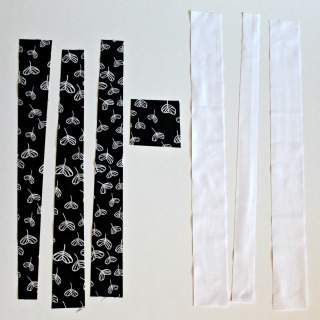
Begin by cutting a squarish shape from the black and white fabric, about 3 1/2″ square, i.e. it shouldn’t necessarily be a square but close. Also cut several strips of both fabrics, 1 1/2″ – 3″ wide. Feel free to slant the strips or you can wait to give it some wonk when you trim each row before continuing on.
Suggested strip lengths:
2 each of white solid: 6″, 8″, 12″
2 each of each print: 8″, 10″, 14″
Or you may work with WOF and trim as you sew.
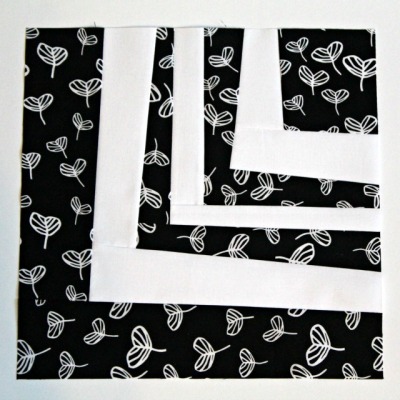
Sew a white strip to the left of the square; press and trim along bottom edge. Sew a white strip on the bottom of the square; press.
Continue adding rows, alternating solid and print. Trim left edge and bottom each time before going on to the next round.

Keep an eye on how your block size is progressing as you go – it might make a difference how much you trim or what size strip you use next. The final block size should be 12 1/2″ square. When you square it up, though, feel free to give it some wonk.
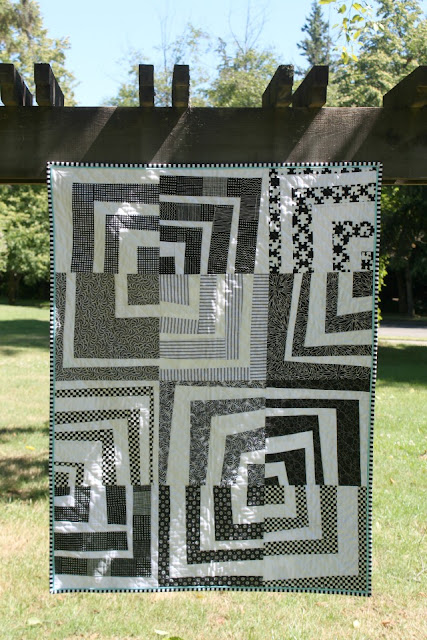
Here are the two quilts the guild made with these blocks:

You might remember I also had Faith Circle of do.Good Stitches use the block to make Quartersaw, which we finished early this year.
Suggested strip lengths:
2 each of white solid: 6″, 8″, 12″
2 each of each print: 8″, 10″, 14″
Or you may work with WOF and trim as you sew.
Sew a white strip to the left of the square; press and trim along bottom edge. Sew a white strip on the bottom of the square; press.
Continue adding rows, alternating solid and print. Trim left edge and bottom each time before going on to the next round.

Keep an eye on how your block size is progressing as you go – it might make a difference how much you trim or what size strip you use next. The final block size should be 12 1/2″ square. When you square it up, though, feel free to give it some wonk.
Here are the two quilts the guild made with these blocks:

You might remember I also had Faith Circle of do.Good Stitches use the block to make Quartersaw, which we finished early this year.
And, I've been working on a scrappy improv log cabin quilt for most of the spring and summer, and finally have it done! So stay tuned.... I'll be sharing that next!


I really love the movement that these blocks can give to a quilt. Thanks for sharing your tutorial and method!
ReplyDeleteGreat tutorial, thanks for sharing!!!
ReplyDeletethis is very appealing to me as I seem to have trouble with log cabin keeping the seams straight etc will certainly have a go thanks for the info
ReplyDeleteThanks for the tutorial! It's a great block especially the black and white versions.
ReplyDeleteOh, I love these blocks. I have some black and white I'm saving for this.
ReplyDeletevery cool. something else to play with later on! thanks
ReplyDeleteA very cool block thanks for sharing with us!
ReplyDeleteWhat a fun block! I should revisit making these in the near future!
ReplyDeleteThanks for sharing. Inspirational, as always. The problem is that I now have too many ideas swirling around in my mind!
ReplyDeleteThanks! This is definitely happening!!
ReplyDeleteI saw the scrppy quilt first and liked it, but the black and white is so striking! Thanks for sharing the tutorial!
ReplyDeleteVery cool
ReplyDelete