Showing posts with label drawstring bag. Show all posts

Wednesday, January 7, 2026

Patterns to Try | Quilted Stripe Drawstring Bag

The minute I saw it, I thought the Quilted Stripe Drawstring Bag would be a fun giftbag, as well as a good use for scraps. The pattern was created by Annabel Wrigley @littlepincushionstudio and posted on the Janome site. I pulled and cut the fabrics needed, packed them to take to the guild holiday party, and spent maybe 15 minutes sewing the initial stripes together, took it back home, and proceeded not to touch it for nearly a month.


Once I got back to it a few days ago, it didn't take long to do the remaining piecing, quilting, etc. etc. And isn't it the cutest?? I did have to cut and add two more stripes to make my slab the correct size. Once pieced and quilted, the slab was trimmed to 10" x 21".

Due to the thickness of the body of the bag, the closure flattens out a bit once the bag is closed. But the cute bag stands by itself, and the quilting and colorful stripes just add to its cuteness.

Thursday, February 15, 2024

Mini Log Cabin Bag

It was September 2022 when Alison Glass @alisonglass and Giuseppe Ribaudo @giucy_giuce hosted the Mini Series Sew Along. I made 15 - 4.5" unfinished blocks, with the intention of eventually making them into small gift bags. I'm finally ready to make that happen!


First up is also the first block I made in the sew along - a log cabin. Though I'm not following a pattern per se, I have the basic technique of the Project Drawstring Bag by Svetlana @sotakhandmade in my head, and am doing something very similar. Though of course, first, I had to remove the papers from the back of the paper-pieced block.


Fabrics for this first bag are Essex in Natural for the exterior, the Ledger print from Carolyn Friedlander's Architextures for the lining - which was also the background for all of my mini series blocks - and a coordinating stashed blue print for the casing. I'd made similar bags after taking a class with Giuseppe back in 2018, and for those, had quilted the exterior. I chose to do the same this time, and since I wasn't using interfacing or batting, the quilting kind of made the fabric pucker a bit. I pressed it after, of course, and actually like the texture the quilting adds. 


As a reference for future bags, I cut the exterior pieces for the front sides 2.5" x 4.5", and 3.5" x 9" for the top and bottom framing the log cabin. I sewed those pieces on, then quilted the front, then trimmed it slightly to square it up a bit. I cut the backing 9" x 10.5", quilted, then trimmed to match the front. The final bag measures 8.5" x 10", including the casing.


What fun! I hope to continue to make more drawstring bags with my mini blocks in between other projects. Already mulling over which block to use next. 

Monday, April 18, 2022

Rounded Drawstring Pouch

I'd had my eye on the Rounded Drawstring Pouch tutorial by Sunny Day Supply for several weeks, so when it was time to whip up a little something-something for my grandgirls for Easter, it seemed perfect timing to give it a try.


Small projects like these are the perfect chance to dig into stash for some cute prints. I totally forgot to get a photo of the bag linings, but trust me, it was fun to coordinate them with the exterior and casing fabrics. And isn't the rounded shape of these bags just the cutest?


The finished bags measured about 7" high by 12" wide, and were a super quick sew.... perfect for squeezing into a busy day plus taking a short breather from the larger work in progress! Thinking I should make a few more just to have on hand.

Wednesday, December 22, 2021

Field Bag

Oh this was fun! I needed a handmade guy gift and happened across the Field Bag. Designed as a project bag, the pattern was a collaboration between Grainline Studio and Fringe Supply Co., which closed shop in 2020. 

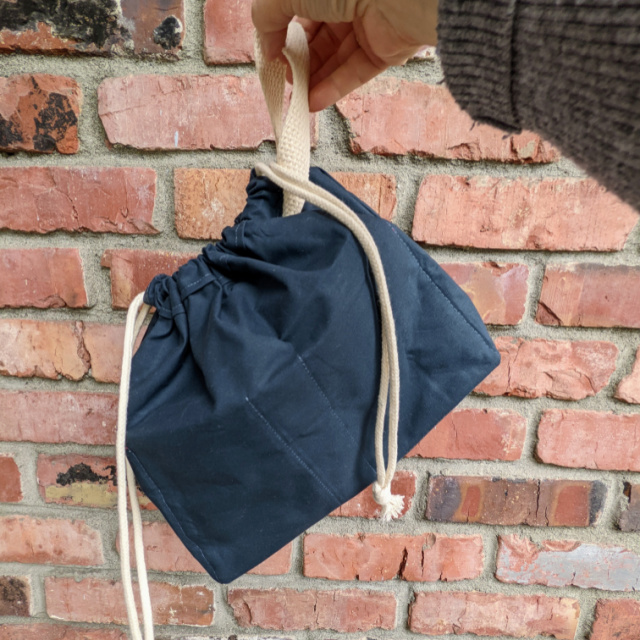
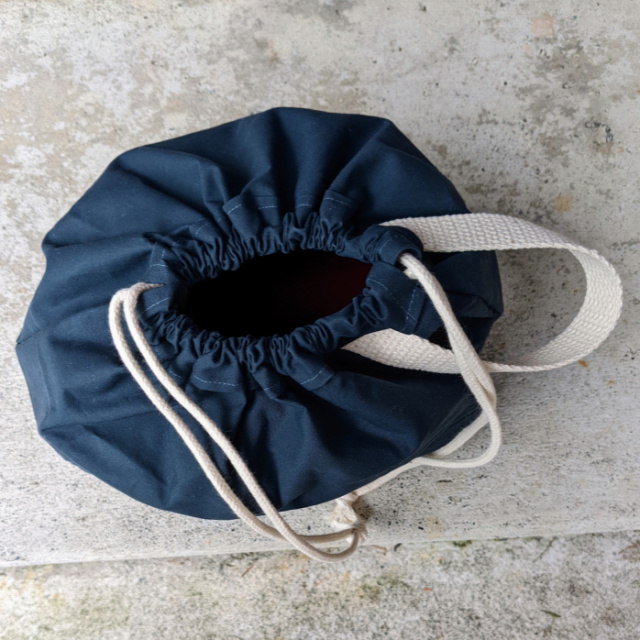
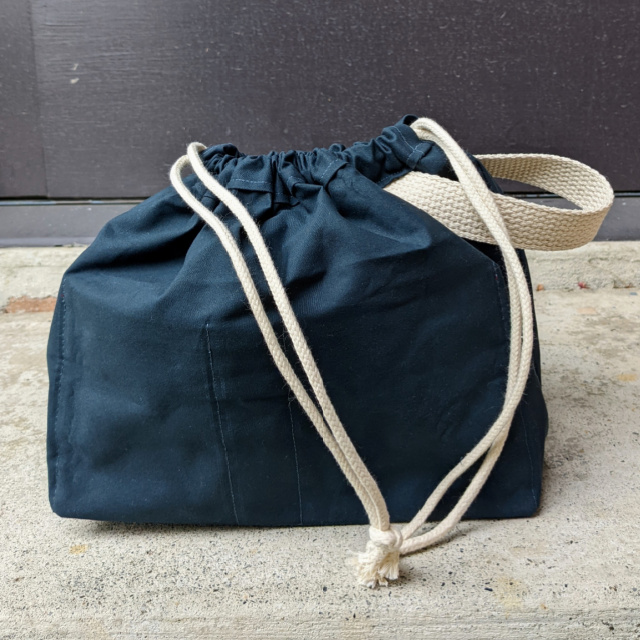
The bag is unlined, but all the seams are either finished or hidden, so it's a really nice finish. Though canvas was the suggested fabric, I opted for an exterior of Robert Kaufman Waxer Canvas, with the interior pockets from Big Sur Canvas, also by Robert Kaufman. That pairing worked beautifully.

You can read about my experience with the Copyshop in printing the pattern. It was a great learning experience, though if I'd had the dimensions, I could easily have measured and cut the pattern pieces, as they were all rectangles. And considering I was using waxed canvas, I didn't mark like I might have on regular fabric; though I did test using pins and they worked just fine, so they were helpful in a couple of spots.

The pattern was great, but as a bonus, I was able to refer to a series of YouTube videos from the Field Bag Sew-Along earlier this year. I especially found Days 5 and 6 helpful, as the final bag construction came together. There are two particularly interesting and unique construction techniques used - for the casing, and for the gusset - and both added some fun ah ha moments.

I finished my bag off with 1" cotton webbing for the handle and 5/32" cotton braided cording, inserted with a bodkin, of course. And though the original bag has a helpful feature for knitters that involves grommets, I chose not to use them. That said, I know now how to simplify the pocket section just a bit for my non-knitter needs.


I made the bag for a young dad, as I could totally see it as a handy 'grab and go' bag, and he totally agreed. Gotta love folks who appreciate a handmade gift!

Monday, June 10, 2019

On-the-Go Project Bag

OK, I have a new favorite bag! After making the Pleated Pouch from Svetlana Sotak's That Handmade Touch, I thumbed through looking for what would be next, and the Project Bag won. One thing is, its leather handles called to me, which took a little planning ahead, since I don't keep those on hand. Luckily, Anna/noodlehead does, so I ordered them pronto.


Fabric choices came entirely from stash, though I knew from the very beginning that the lining would be the Rifle Paper Co. floral I bought when the guild was recently retreating at Quilting Mayhem (Wildwood Garden Party for Cotton + Steel). I'm not really a floral fabric person, but this I love. I finally broke down and bought some to stash, and I'm sure glad I did. I love its sweetness paired with the more graphic Esssex print I chose as the bag's main fabric. THAT's from the Balboa line by Erin Dollar, and I absolutely adore it for this use. And the bottom fabric is also an Essex - from Carolyn Friedlander's euclid.


So just a few notes about my making of this bag:
  • Take careful note of the orientation of the fabric. The pattern clearly states to measure width by height, yet when it came time to sew on the interior pocket, I mistakenly had my fabric orientated wrong and I sewed the pocket on facing sideways. Oops! Totally my error, and easily fixed, but just pay attention.
  • Sometimes I have issues with medium to heavy weight fusible interfacing, so I chose to use Pellon 911FF Fusible Featherweight, and I'm happy with my choice. The bag still has plenty of structure and stands on its own when empty.
  • I love the leather straps, and they were one reason I really wanted to make this bag. I purchased a 3/4" wide 56" length from Anna Graham's shop. It's high quality, easy to cut with a rotary cutter, and my 12/80 needle passed through it easily. Plus, I have plenty for another bag or other project.
  • Lastly, about those leather ties. I used my favorite leather lacing that I usually use for zipper pulls, but it's a little stretchy for this use. So I'm thinking of switching those out. Love the look though!

Finished bag size: 10" wide x 12" tall x 4" deep

So no surprise here.... this one is one I'll make again for sure. When I'm deep in working on larger projects, I sometimes like to take a break to make a smaller project and actually finish something. This bag totally fit the bill.

Monday, October 8, 2018

Using those Tiny-Pieced Blocks

After spending the day doing tiny piecing with Giuseppe/@giucy_giuce a couple of weeks ago, I had in mind to do with my little blocks just what he had done with his.... incorporate them into small drawstring bags. My go-to for such things is Svetlana/S.o.t.a.k Handmade's drawstring bag tutorial. I've used it more times than I can count and it was just what I wanted for my tiny-pieced blocks.


I used a linen-blend for the main portion of each bag, and coordinating fabrics for the linings and casings. For the larger one, I backed the linen with lightweight interfacing SF101, which created a soft yet somewhat structured bag.


For the smaller bag I forwent the interfacing, so of course it's a little more pliant. Both ways totally work.


I totally winged it on the size of the linen, with the larger bag finishing at 9" x 11" and the smaller at 7" x 8". Some waxed twine was perfect for the ties. So that was fun, and I anticipate making more at some point. What are your ideas for using these tiny-pieced blocks?

Linking up with Finish It Up Friday!

Friday, November 23, 2012

Ruby Star Wrapping :: The Melody-Didn't-Mean-to-Make-It Tote

Apparently, this Ruby Star Wrapping pattern was an accident, created unexpectedly while designing a different project. But considering my fondness for fabric bags, it was one project in the book I needed to try. I pulled out some pretty special fabrics - my first Anna Maria Horner Field Study for the main bag fabric, Lizzy House jewels for the accent, and a new favorite, Dear Stella Diamond Dots for the lining.
Please don't get me wrong - this bag turned out great, and I very well will be making it again. But I struggled with just a few details. One being the contrasting top - it was shown in the book's photo, and one of the details I really liked about it, but specific directions weren't given, just the measurement of this piece. Because of this, I think, my batting didn't go to the top of the focus fabric. Maybe this was the intent, but it seemed a little odd. Also, adding the circle bottom of the bag was in no way an exact science. It confused me for a bit, but it seemed just fine in the end.

Meanwhile, I loved the suggested random quilting - just some angled lines here and there. And the use of the batt gives the bag a really nice hand. One little warning - I'll tell you up front there are buttonholes involved! I shortcut and only put in one as I was having, uh, issues. But I think it'll work just fine. Oh, and do know that this is a good size bag - 10" wide at the bottom x 18" tall. It'll hold serious stuff!

Ruby Star Wrap-Along
Check out Lucky Lucille for her take on this project. Linking up with the Ruby Star Wrap-Along,  Finish it Up Friday, and the Ruby Star Wrapping Contest.

Tuesday, April 10, 2012

W.i.P. Wednesday

All sorts of odds and ends to share for W.i.P. Wednesday this week, which is kind of surprising with a busy {read: awesome} weekend with family.

Completed projects
Windows Improv table runner - After really struggling whether or not this project was going to 'work', it did! I posted and shared more pics here.


"The Everything Bag" - A little project I snuck in and can't resist showing off again. Yup, it's another one from Jeni's pattern {here}. Love it!

Zakka Style Sew-Along project #1: Zigzag Tote - Completed, posted here, and gifted already, plus featured as one of Sukie's favs {here}! Can't beat that!

Modern Blocks Bee April block - a "Potager" block from Modern Blocks, designed by Yvonne Malone of Yvonne Malone Studio.
Modern Blocks Bee - April 

Ongoing projects
First and foremost is Hopscotch - I have 58/77 blocks pieced, the backing purchased, and an appointment with my long-armer. Need to keep pushing through to get this top done!

Festival of Half Square Triangles - Still just pressing and trimming, while focusing more on other projects.

April do.Good Stitches - This month the FAITH Circle is making two zigzag quilts. I'm enjoying putting together my contribution - one gray zigzag strip, using 4" hst.


Hollywood Boulevard table runner for a friend - the focus fabric being French General by Moda. (I'll be using the same pattern as this runner.)

Upcoming projects
* FAITH Circle Pouch Swap
* more Zakka
* a quilt to coordinate with my Christmas tree skirt - On a Whim ??
* DS Quilts Doll Quilt Swap project - waiting on fabric
* scrappy Metrolink
* tutorial for pieced binding
* a zip pouch w/o zipper tabs - want to know this way too

Linking up with W.i.P. Wednesday . . .

Thursday, March 8, 2012

For the Love of Solids2 - Given

The For the Love of Solids swap last year was so fun and gratifying, there wasn't really any doubt if I would participate again for round two. Obviously yes. And fresh from the Japanese x and + block swap, I was easily influenced  to go rogue and make some solid blocks. Playing with some photo graphics of blocks I'd made for the x and + swap helped me figure out a plan for a variation all my own.
I pretty much grabbed the majority of my solid stash and got to work.
After stitching up the first little 5" block, I was encouraged.
This was one project where my design wall was my friend.
Bit by bit it all came together.
When it came to quilting, I wanted to show off the small center blocks as much as possible. So after detailing each of the small blocks, I echo-quilted around the large '+', moving farther apart with each row. After much deliberation, I had succumbed to the temptation to use variegated thread - the wonderfully colorful King Tut "Joseph's Coat" by Superior Threads - and was really pleased with the results.
As a final touch, I made pieced binding, matching up with each color in the big block.
For my small project, I used solid scraps to make a Lined Drawstring Bag made from Jeni's pattern. (Love the chevron twill tape I found at Amy Dunn's pinked fabrics!)
So there's the saga of FTLOS2 - sure hope my partner is pleased!

Linking up with T.N.T. Thursday and Finish It Up Friday.

Monday, February 27, 2012

52 lists in 52 weeks//week 38 and A Tiny Bag


Since making the largest drawstring bag from Jeni's pattern, I've been wanting to try some of the other sizes. (You can purchase the pattern here, though one size is offered as a tutorial here.) I decided to do double duty, and make it in all solids as my small project for my partner in the For the Love of Solids swap. Funny thing, with the pieced front, it took as long to make as the big bag {here}! And I realized after I finished that the cute ties aren't really solid, now are they?

Monday, January 30, 2012

Monday Finishes

Jeni of In Color Order recently shared a drawstring bag pattern that I've been wanting to try, so when my mom mentioned she could use a laundry bag for traveling, it was the perfect chance. (You can purchase the pattern here, though a smaller version is offered as a tutorial here.)
I'd had this purple triangle print in my stash for a while (by Brandon Mably, a designer with Kaffe Fasset), and mom and I both loved it for this project. The bag was easy and fun to make, and I'll definitely be making more in other sizes. I think the 'yoke' detail of Jeni's pattern really adds to it, allowing for fun contrast.

After posting a pic of the Modern Halves completed top yesterday, I was surprised how quickly the quilt came together once I got to my sewing room last night.
I debated about the binding for a while, thinking bright color was certainly in order, but in the end, settled on a dark gray to frame it all. While I love the scrappy look of my version of the original made by Elizabeth of Don't Call Me Betsy, I realized soon after starting that my scrap basket wasn't full of enough long lengths of fabric. So I got as far as I could from my scrap basket for each block, and then went to my stash to finish a few of them up. I especially like how the vertical lines are so pronounced when the colorful halves were re-pieced together. My version will make a nice lap-quilt, finishing up at 54" square.

Linking up with {sew} modern monday, Slash the Stash, Fabric Tuesday, finish it up Friday, Scrap Attack, and the Festival of Scrappiness at Stitched in Color.